Sending Bulk Emails in Azure without O365 Email Solution
When you use any email service, there is a limitation to sending bulk emails in a day. If you are using the o365 product, you cannot use that product for sending bulk mail. Even if you go to Microsoft, they will give you the same answer. Then what?
Azure has one more service to overcome that issue. The service name is Azure Communication Service. This service we can use to send emails in bulk. You send bulk emails mostly for bookkeeping, simple surveys, and marketing. improve your time-to-market with scalable, reliable email capabilities with your own SMTP domains. Your Application uses Rest API and Client library SDKs to connect Azure Communication service to send these emails.
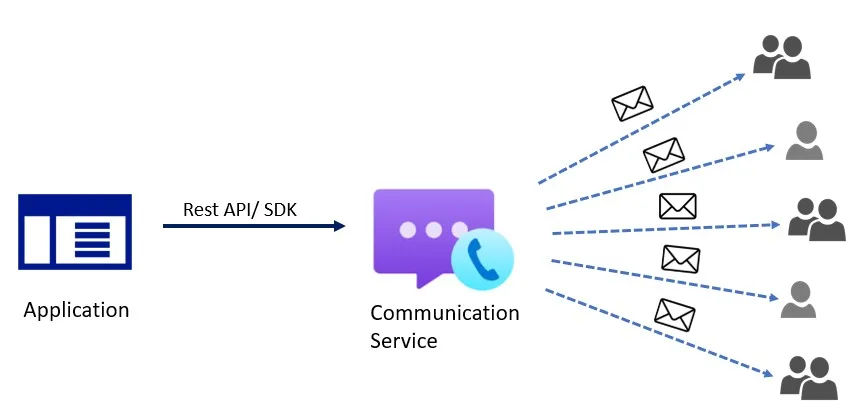
Other than email service, this service can be used to make audio/video calling, text chat, and SMS that easily integrate with your application.
Today we are going to see how to configure Azure communication service without having any prior knowledge of Email services.
High-Level Steps:
- Create Azure communication service
- Create an email communication service
- Add domain
- Verify DNS records
- Integration between two Communication Services
- Email Testing
- Monitoring Email Events
Pre-requisite:
- An Azure account with an active subscription
- Contributor access on the Azure portal
- Access to domain hosting site to add DNS records if a custom domain is chosen
Installation steps:
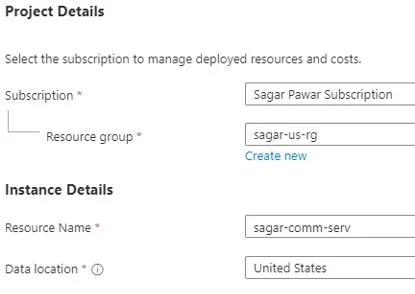
- Create Azure Communication Service
Creating an Azure Communication service is very easy, You have to login into the Azure portal. Search for Azure communication service, provide a subscription, and resource group. Type the resource name and select the data location from the drop-down list. This location determines where data will be stored. After creating the service, it will generate the endpoint, keys, and connection string.
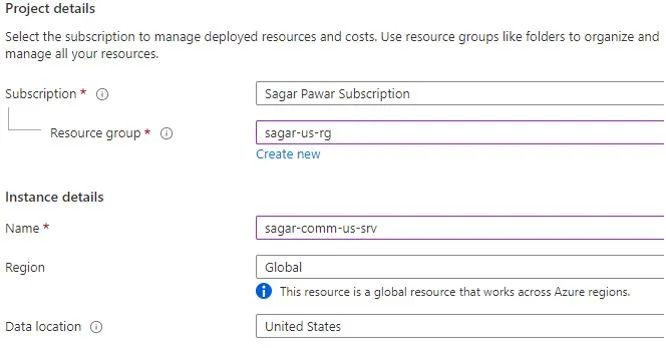
2. Create an Email Communication Service
Search for email communication service in the search bar of the portal. Select the subscription name and resource group where you want to create the service. the region is global by default. Keep data location as same as the communication service. This service is still in preview and available in the United States only.
3. Add Domain
Open Communication service, go to the provision domain option. Click to add domain, and you get two options, either Azure managed domain or custom domain. In this demo, I am going with a custom domain. When you select custom domain, it will ask you to fill in domain detail which you can verify at a later stage.

4. Verify DNS records
In the previous screen, you added the public domain, but now you have to configure them one by one. Configuring means you have to add TXT or CNMAE records in your public domain hosting server. To provide more security to your email and you need to add DNS records for SPF and DKIM. Basically, you have to add 4 records (two TXT and two CNAME). Domain verification takes 15-20 min. You will see the below screen after verification.

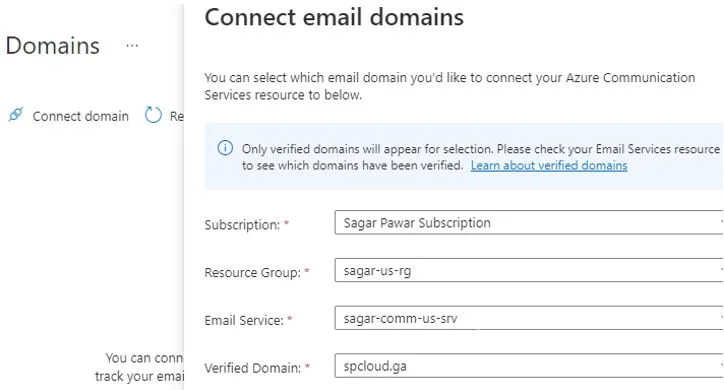
5. Integration between two Communication Services
Azure allows only connecting the domains in the same geography. Please ensure that the Data location for the Communication service resource and Email Communication service Resource are the same.
Go back to the Azure communication service, and select domains from the email section. You need to open connect domain option. Provide details of subscription, resource group, email service, and verified domain. Email service is nothing but your Email communication service resource. Only verified domains will be visible to choose from.
6. Email Testing
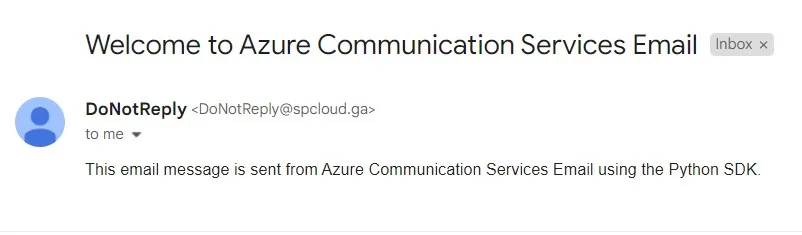
Go to the overview of the Azure communication service, and copy the endpoint, access keys, or connection string. Use the required details in the application code to send a mail. You will get the Form email id from the Email Communication Service where you have configured your public custom domain. It is available in the overview section of it.
Azure Communication Services Email client libraries can be used to add transactional Email support to your applications.
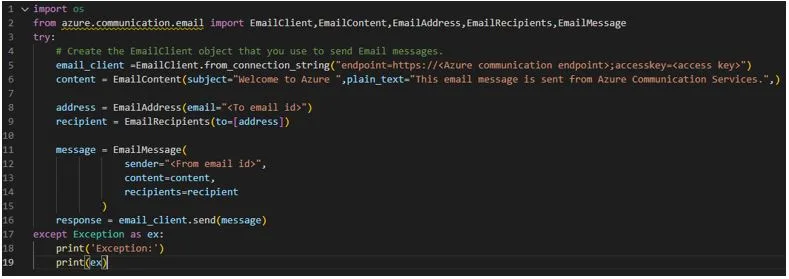
I created the below python script to send a mail. You have to update the connection string, From email id and To email id in the script for sending mail.
7. Monitoring Email Events
If you need to check email events, you need to create an event subscription. The first step is to create an event grid service and web app to proceed. An event grid is required to collect events and a web app is required for webhook which triggers based on events. In the configuration, you can select email-related event types, Email Delivery Report Received events, and Email Engagement Tracking Report Received events.

After the above configuration is done, you will send multiple emails, you can see the tractions below. You will find how many emails have been sent. Out of which how many are delivered, failed, filtered spam, and quarantined?

This service is still in preview so do not use it for the production environment but you can use it in the lower environments. This service has made life easy for developers and testers to check application email functionality.
Thanks for reading, Keep following #MultiCloudSagar for new update.