Azure Service Principle Name (SPN) for single or multiple organizations for REST API
The requirement is to integrate your business application with Azure AD, you have to do App registration first. During the process, it generates an App identity. This is also known as Service Principal Name (SPN), local to the Azure Active Directory tenant.
Through Service Principle Name helps in-house or third-party applications to register with Azure AD. Applications use the Service Principal Name to generate tokens under the local tenant and do CURD (Create. Update, Read and Delete) operations on Azure Resources with Azure RBAC roles. These Azure resources are part of the subscription created under the same tenant. . You can create a service principal via Azure Portal or PowerShell or CLI.
We will see now how to set it up.
Pre-requisite :
- Azure AD tenant-level access to create SPN
- Subscription Owner level access to Assign RBAC role to SPN
SPN creation for Single Organization
- Login into the Azure portal, search for active directory service, open it and go to app registration. Click on Add, provide SPN name and select only the single tenant option. No re-direct URL is required for a single tenant.

2. Click on register to create SPN. Note down Application (Client) ID , Directory (tenant) ID.
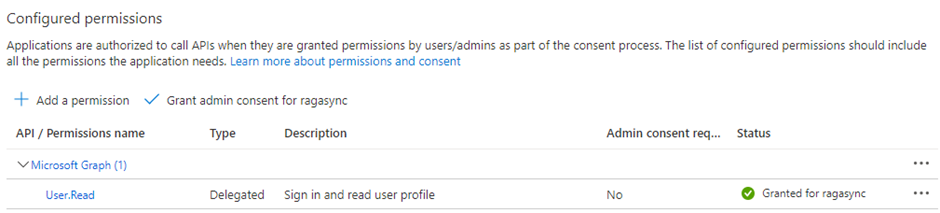
3. Double click on the newly created SPN, go to API permission and provide Admin consent
4. To generate a password for API, double-click on SPN, go to the Certificates and Secrets option, and create a new client secret. Provide value and duration of expiry. After generating the ID, note down the secret value.
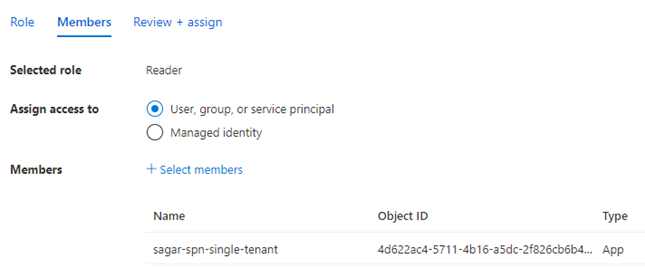
5. If you want to perform operations on Azure resources, you have to give subscription-level permission to your SPN. For multiple subscriptions, you can add an SPN account in the security group that has permission on all subscriptions or else give permission on a management group level. To give permission, go to the subscription of your tenant, go to IAM, and add SPN with the required role.
This will complete your SPN account creation process for a single tenant.
SPN creation for the multi-tenants organization
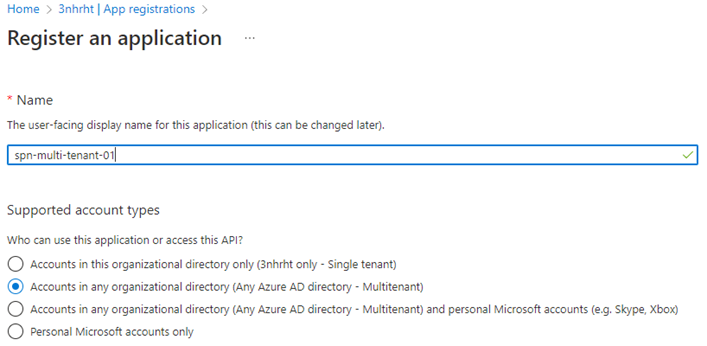
- Login into Azure Portal, Go to Active Directory service -> App registration -> Create ID. Provide SPN name and redirect URL – https://www.microsoft.com

2. Click on register to create SPN. Note down Application (Client) ID , Directory (tenant) ID
3. To generate a password for API, go to Certificates and Secrets, and create a new client secret. Provide metadata and duration of expiry. After generating secrets, note down the value.
4. Provide access to another tenant by setting up an URL to authenticate SPN.
https://login.microsoftonline.com/<Tenant 2 ID>/oauth2/authorize?client_id=<Multitenant application ID>&response_type=code&redirect_uri=<redirect url>
5. Update the bold values in the link. Application id and redirect url, you will get from the above screen. To get Tenant 2 ID, you have to login into Azure portal -> search for active directory service, open the service, you will get tenant id in the overview section
6. Put the updated URL in an internet browser, it will prompt for the credential. You have login with an account that has a Global Administrator or Privileged Role Administrator, for granting consent for apps requesting a permission
7. You have to accept consent on behalf of the organization as shown below

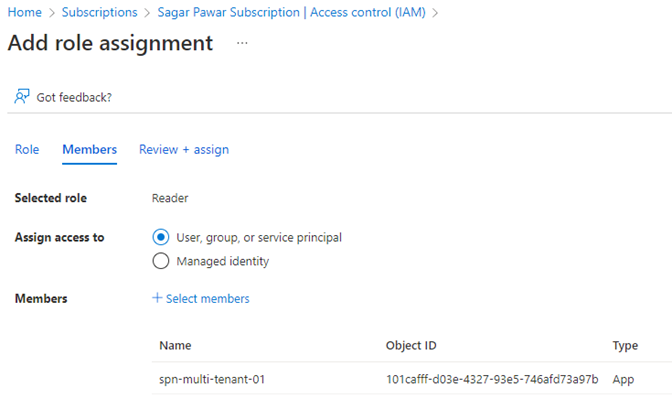
8. Login into tenant 2, open a subscription, go to the IAM section and add an SPN with the required role
This will complete the SPN creation process for multi-tenant organizations. The next step is to generate a bearer token and test the API call
API Testing with SPN
- Download the postman tool, open it, and click on new. Provide tenant ID, SPN App ID and SPN Password which you have generated in the creation process.
Note: you can use https://management.core.windows.net URL for resource key in the header field for a single organization and multi-tenants organization
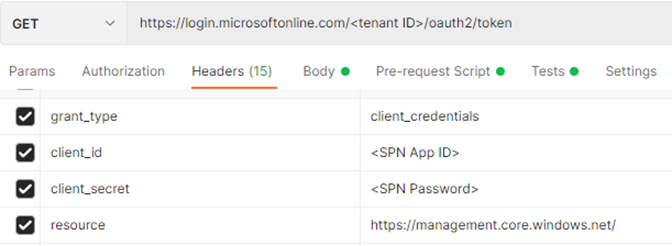
2. click on send, it will generate a bearer token which will be valid for 30 min.

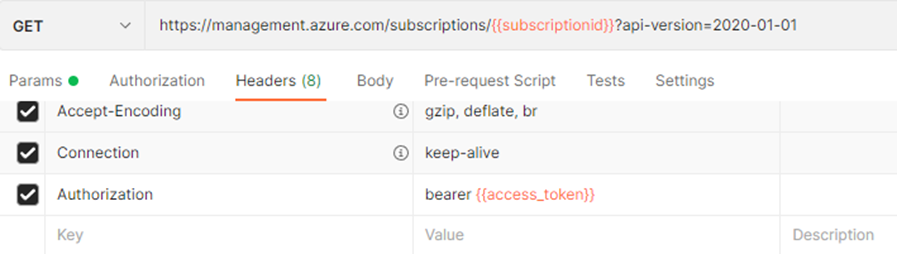
3. Now with this token, you can make an API call by updating the subscription id and bearer token generated above, the example given below
If your company has signed the Enterprise agreement, you can not assign an EA role to your SPN directly. You have to use the REST API call available in the below link to get the EA role to your SPN. You can use this API if you have an enterprise administrator or writer role assigned.
https://docs.microsoft.com/en-us/rest/api/billing/2019-10-01-preview/role-assignments/put?tabs=HTTP
If you are comfortable with postman, there are Azure API collections available on the link, https://documenter.getpostman.com/view/6227162/T1Ds8abg
Thanks for reading. Keep learning and growing with me.