Setting up Accops HyWorks in Azure and AWS Clouds
In the last article, you have gone through Accops HySecure Product. You got an idea how to install, configure and publish App through it.
Similar like HySecure, we will evaluate another product HyWorks. It does desktop Virtualization. You can use this product with HySecure to form digital workspace. Or else you can use as single product as shown below. This product runs on top of Private or public cloud to provide App and desktop virtualization for customer.

Today we will see how to install and configure HyWorks in Azure and AWS. Installation steps are exactly same.
Pre-requisite:
- . net framework 4.7.2
- Microsoft SQL compact edition , v4.0
- SQL Express edition
- Windows server 2008 and later version
- Based on user base, select SKU in Azure and AWS
- Open port 1433 for DB, 38866 and 443
Installation Steps:
- You need to sign-up Accops support portal with your professional email id if account exist initially. if not, sign-up and verify the account with verification link. Login into Accops support portal to download HyWorks latest software.
2. Set up Windows machine as mentioned in pre-requisite. Install .net version if not installed. It is auto-installed with latest windows OS version. For installing SQL Server Express Edition, you can download it from Microsoft site and install it in same system where HyWorks will run. SQL Server Express edition will work as standalone database server. You can not setup DB cluster with it so this is one of the limitation of it.
3. Download the software and save it local drive, run HyWorks controller exe , it will prompt you to install Microsoft SQL server compact edition v4.0. If it is not installed, it will re-direct to Microsoft site to download it and then you can install it with all default settings.
4. Click on HyWorks controller setup again. accept EULA (End User License Agreement). Select default installation path. You will get three options, Accops HyWorks controller, management console, reservation management service. I am going with first two Accops roles.
5. Select deployment method, Active-Passive or Active-Active. Active-Passive option is applicable for standalone as well.
6. Installation will verify SQL Server Express edition. If it is installed, it will proceed.
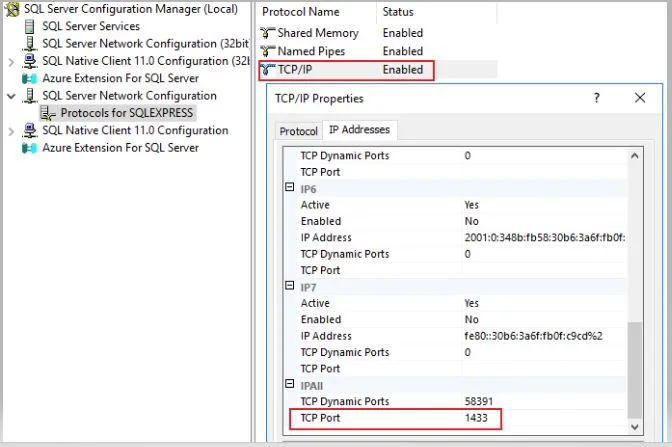
7. You have to do additional configuration on SQL server to access it on port 1433. Download the SSMS (SQL Server management tool) from Microsoft site, connect to SQL server with windows credential. Open SQL Server configuration manager, start SQL Server Browser service if not started. Go to SQL Server Network configuration, click on protocols for SQLExpress, enable TCP/IP and add static port 1433 at bottom.
8. Enter database address, localhost\sqlexpress and connect to EDCDB database on port 1433 with windows credential.
9. Enter database address, localhost\sqlexpress and connect HyLog database on port 1433 with windows credential.
10. Configure HyWorks controller Administrators, provide password for account HyworksAdmin. Configure local account to run HyWorks services. You have option to set service with another account as well.
11. Set default port 38866 for HyWorks controller service, 443 for HyWorks Management console.
12. Click on install to start the setup process. It takes 30-35 min to install HyWorks Controller Service and HyWorks Management Console.
13. After installation, it will provide Web based Management console link to access.

Configuration Steps:
- On the HyWorks Dashboard, you get below options.
- Monitor – Monitoring Status of Users, devices and licenses
- User – User and group creation
- App – Virtual applications creation and configuration
- Device – Device registration
- Policies – Related with profiles and Entitlements
- VDI – Creating session host and pool
- Setting – HyWorks configuration
- Logs – Collect HyWorks Logs
2. Go to User Section, go to User Store, Add local user, make it active, set the password. Click next, keep group section blank, go to Session Teams , select Windows default under that. I do not have active directory hence I am showing demo with local user as of now. It is not certificate based login like HySecure. It is web based login. Note below roles and its purpose to plan roles in future.
- Super Administrator – Top most admin permission
- Administrator – Manage Org, app, pool, session, entitlement and user permission
- Assistance/Incharge/Participant/Reservation admin – All for RMS
- Helpdesk – Helpdesk role
- Session Recording Auditor – View Session recording
3. Under User Store, add Local group. Add newly created users under this group.
4. Go to setting, click on Configure –> Connector –> Add. Select Type as Azure from drop-down. For Connecting Azure Cloud, you need to provide RDP Port, Application ID, Secret, Tenant ID and Subscription id. Application ID means you need to create service account in Azure Active Directory.
On other hand, for AWS, you need to provide AWS account ID, Secret Key, Access ID and region. You will get these details from AWS IAM console.
Similarly Connector is available for Hyper-V, VMware, Nuntanix, Physical PC and Oracle Cloud.
You will see below screen after creating connection for Azure and AWS successfully.

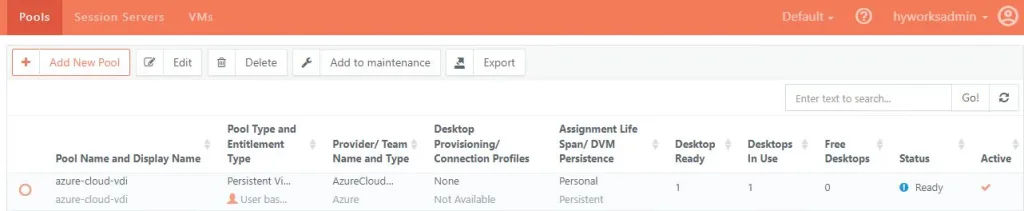
5. Go to VDI –> Pool –> Add New Pool. Give name and display name to pool. Select User based entitlement. It is nothing but mapping. Option for me is shared hosted desktop or virtual desktop (dedicated) or physical desktop. sub-category is persistent (same session data available for login) or non-persistent (session data wipe-out with log-off). Right now I will go with persistent virtual desktop.
Select session provider is AzureCloud-Sagar created in previous step. Provisioning state is none as virtual desktop is available to use in Azure Cloud. Assignment life span of virtual desktop is personal desktop. It means same desktop will be available to assigned user for life-time. Connection profile is default. Port number is 3389 for virtual desktop.
Assign Azure Virtual machines in desktops section. Assign user. Remaining section will be default as I do not want to do more changes. Desktop assignment will be auto. Classification rule will be un-restricted. Check Summary and click on finish.
6. Download HyWorks Client from Accops portal or from HySecure login page. It provides link to download clients.
7. Install HyWorks with default setting. Open HyWorks Client. Set HyWorks Server IP and Port numbers.
8. Login with user who has got persistent virtual desktop access. After login, you will get virtual desktop for login. Virtual desktop will open automatically.

HyWorks Integration with HySecure
Now we will see how access hosted desktop via HySecure. I already have HySecure setup to start with it.
- Create or export users from HySecure to HyWorks console. You need these users for assigning shared hosted VDI.
2. Setup Microsoft RDS Server. It is nothing but session host server who provide multiple RDP connections to one or more users. Provide name, host address and RDP port. Select session team as windows default. I have single RDS Server right now so I keep weight 100 otherwise I would have divided weight with other RDS server. Max session is 0 means unlimited remote connection will accept. Keep it Active, enable remote control. You can keep Enable diagnostic and Assign Application option un-checked and, as of now. Test the connection. If it is successful, add it.
3. Go to Pools –> add Desktop Pool. Under General tab, provide name to session host, select user based entitlement, select desktop pool as shared hosted desktop. Provisioning is none. Select Server team and connection as Windows Default. Port number is 3389. I will assign user (imported from HySecure). Classification is Unrestricted as of now. Keep default entries in Advanced setting. Virtual IP address is unchecked as it is not required for the demo.
4. Login with HySecure Dashboard with Admin privilege.
5. Go to Apps. select HyWorks Controller from Type section. Provide Name and HyWorks server address. Set Application port 3389, TCP port and allow traffic routing. Keep Advanced option default. Click Submit to apply changes.
5. Add Application group. Provide Application group name. Click Submit to apply changes.
6. Go to policies –> Create Access Control List (ACL) for shared hosted VDI. Select Application access from Access Control Type. Type control name. Select default value from drop-down for HySecure Domain, Authorization server and Assignment type. Select low level security group, search for group. Select group from list and add it. Select application group from drop-down and add it. No access filter and validity are applied. Click Submit to apply changes.
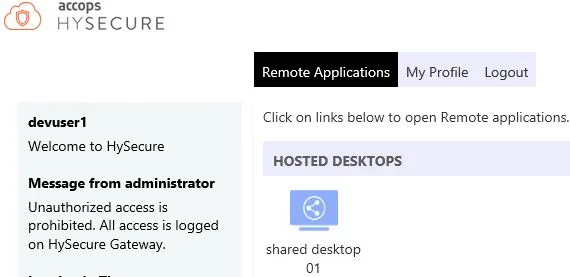
7. Login into HySecure URL with user. Hosted desktop is published. You can click to access it.
Publishing Virtual App:
- First step is to install HyWorks Session Host executable in shared hosted desktop.
2. Login into HyWorks Console. Go to Apps –> Add. Select Windows application platform and application type.
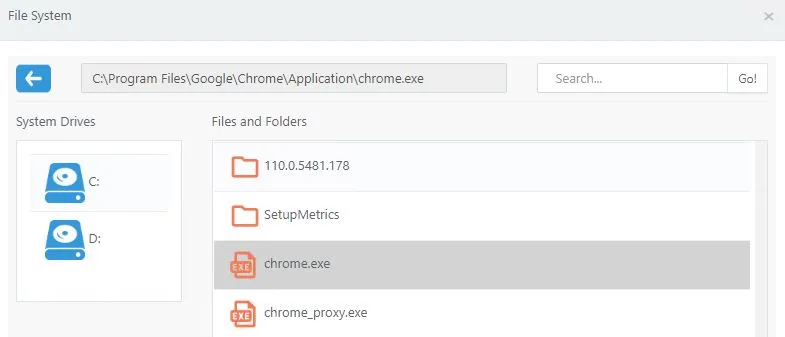
3. Browse the application from shared hosted desktop. Keep remaining options blank on Application information page.
4. Keep default setting in Additional settings page
5. Select teams and server from discovered items
6. Under Entitlement page, select user who you want to give access.
7. Keep Classification Rules as default. Click finish to apply changes.

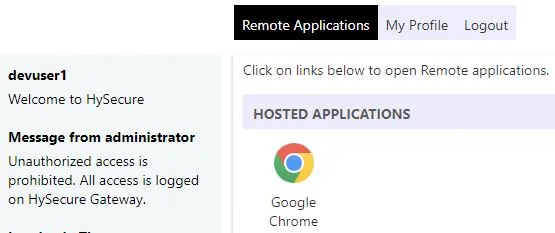
8. Login into HySecure portal with user. You will Chrome app get published.
We have learned how to setup HyWorks for desktop virtualization and how to integrate with HySecure to publish shared hosted desktop and Virtual App for your orgnization.
Thanks for reading. We will connect in next Blog.