Building a Certificate Authority (CA) Server for your Servers and Applications in Free of Cost
In any orgnization, it is best security practice to have SSL certificate installed on servers, application and databases. To get SSL certificate, first step is to have or build Certificate Authority (CA). SSL Certificate and CA make communication secure between client and server or application. If you do not have CA ready internally or externally, you can not issue the certificate to any internal or external application. In that case, risk of application or server on stake as anybody prove its identity and can read critical data to harm the system. The CA is responsible for attesting to the identity of users, computers, and organizations. The CA authenticates an entity and assure the identity by issuing a digitally signed certificate.
This article will focus on how to setup internal CA for your orgnization. It provide better control to IT Admin over implementation and Certificate life cycle management. You can create N numbers of certificates in free of cost. We will use Windows server for it.
Windows server comes with inbuilt Server roles but it is not pre-installed. You can install any one or more roles based on your requirement. All these roles are free of cost so you do not need to pay any additional charges for it.
When you want to setup window server for any role, always go for with GUI (Desktop) OS version rather then core version as it is command line OS and may not have all roles and features available.
In our case, we are going to Windows server 2016 desktop version for installing AD CS role. This role will promote windows server as Certificate Authority to issuing SSL certificate for internal application or server. Let’s understand steps to setup Windows servers as Certificate Authority.
Prerequisite:
- Windows server 2012 or later version
- Windows server is a member of the domain
- Enterprise Admin permission
Installation steps:
- Log into the server where you will set up Active Directory Certificate Service (AD CS). Open the server manager console, click Manage –> click Add Roles and Features. Select role-based installation and click on next. In the Select destination server section, ensure the correct server is selected.
2. Select Active Directory Certificate Service (AD CS) server role, click add features, and click next. Read Active Directory Certificate services details.
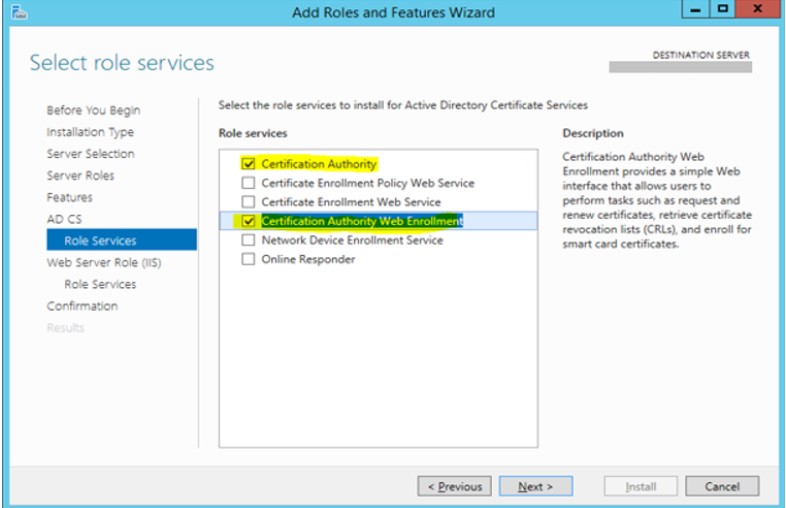
3. Under role services of AD CS, select Certificate Authority and Certification Authority Web Enrollment roles.
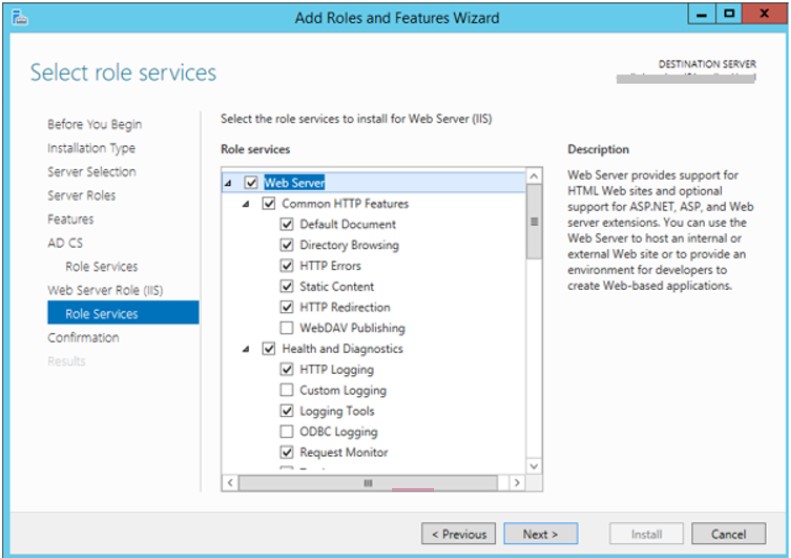
4. Go to the web role role (IIS) and select the web server
5. Confirm installation.
Configuration Steps :
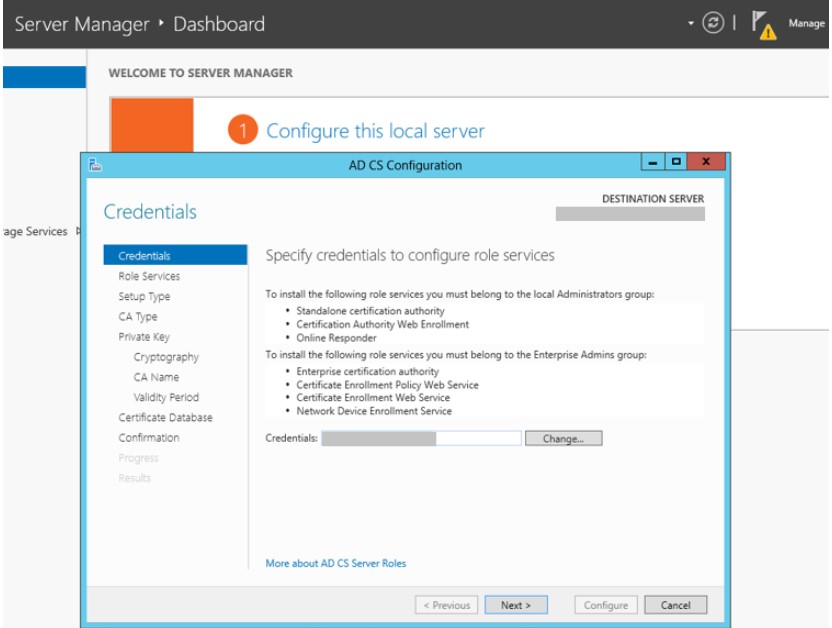
- Click on the flag on the top of the server manager, Add domain credentials having enterprise admin permission to start with AD CS configuration
2. Reconfirm the Certification Authority and Certification Authority Web Enrollment role services to configure
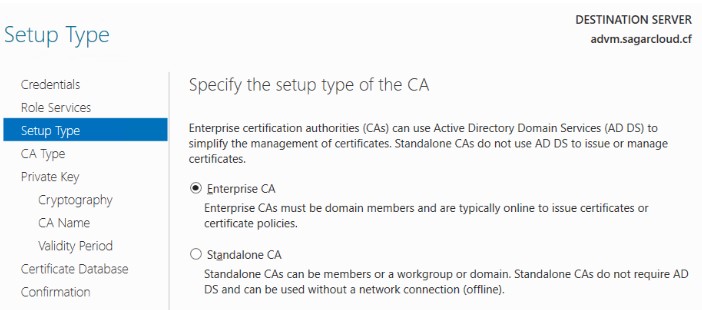
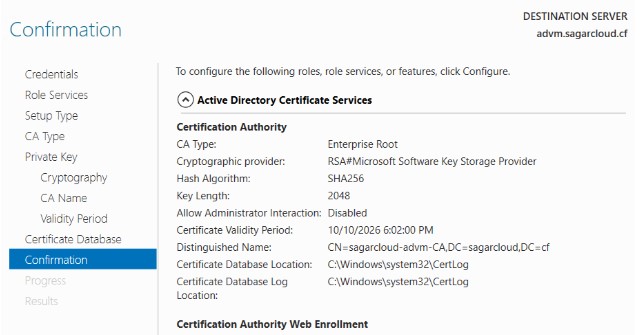
3. Select Enterprise CA to use Active Directory Domain Service (AD DS) service for certificate management.
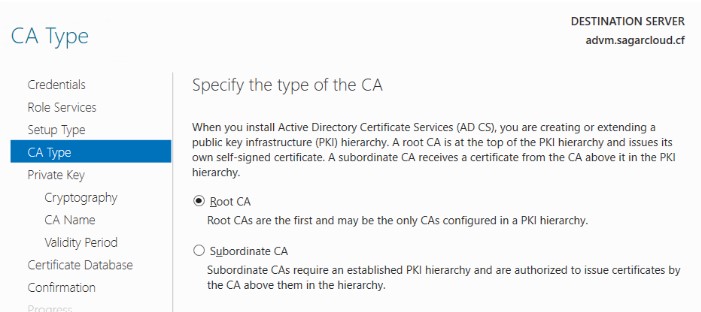
4. Select Root CA as the first CA in the Public Key Infrastructure (PKI) hierarchy. It is at top of the PKI hierarchy.
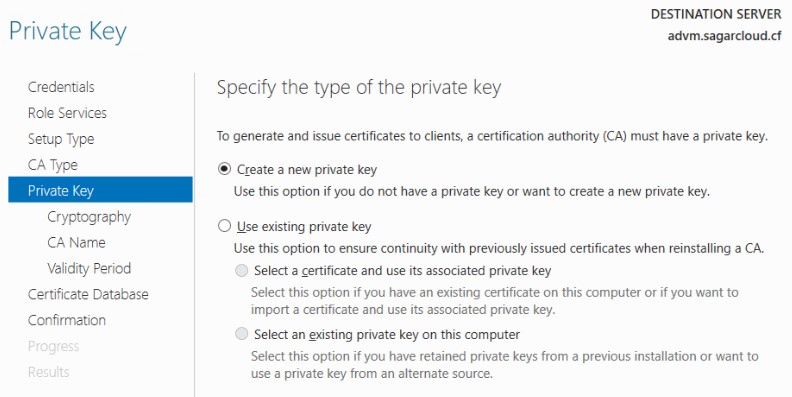
5. Create a new private key to generate and issue a certificate. If you have a Private key, you can use the existing private key option
6. Select cryptographic provider as RSA with 2048 key length, and SHA256 hash algorithm as per standard. You can choose other providers, key lengths, and hash algorithms from the drop-down menu.

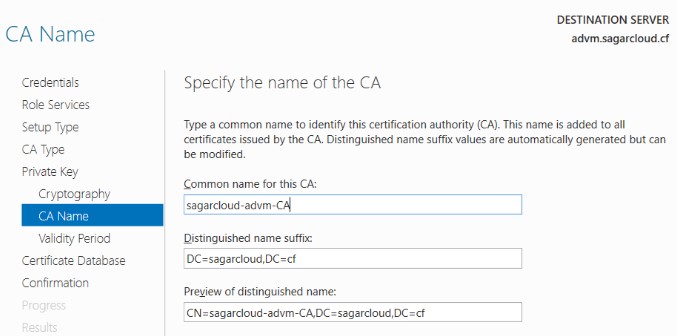
7. Next is to give a common CA name and specify the validity period that determines CA certificate validity.
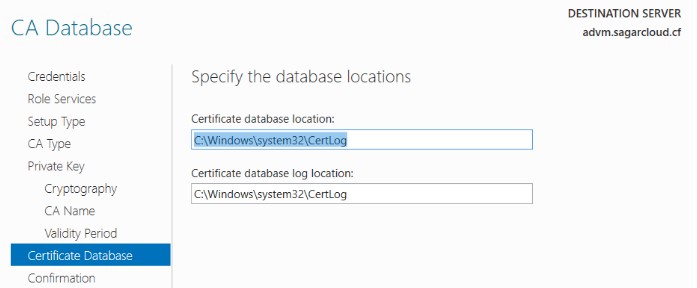
8. Specify the Certificate Database and log location for the certificate
9. Confirm all data is right to proceed. If you want to modify anything, you have a chance to go back and modify it.
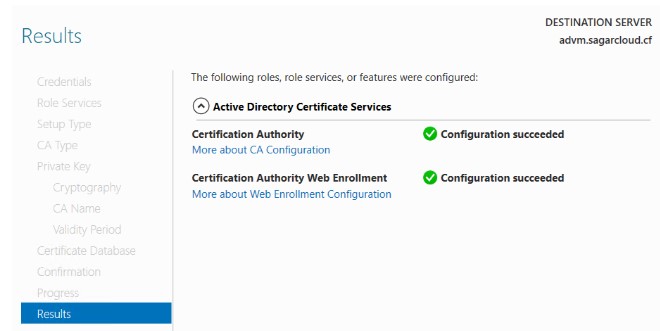
10. This is how CA is configured and ready for use.
I hope you find steps in the article easy to implement. Thank you for reading.