How GCP Private Service Connect is a better option than VPN or VPC peering
Today we will see how consumer applications connect to producer service via Private Service connect. With this service, consumers connect with producers on Private IP between two different VPCs of the same project or different projects. It does not leave GCP Backbone Network so it is highly secure and Infosec recommended options rather going with VPN or VCP peering options.
Consumer means, who request for service. On other hand, Producer means who provides service to one or multiple consumers based on manual connection approval or automatic approval for all.
The interesting point is that if your consumer or producer is not in the GCP cloud and still you can leverage this service by extending the leg to on-premise or in a different cloud as well. You need support from the GCP team to set up private connectivity as traffic going from GCP to on-premise follows different routes compare to traffic coming from on-premise to GCP Cloud. Few GCP services are in the pre-view mode so you need to use CLI or Cloud Shell to enable it.
Below is the Private service connect architecture which we will setup and test today.

Prepare Initial Demo Setup
- For Demo, two VPCs have been created in different projects with Producer and Consumer naming conventions
- In this case, project A is a Producer Project with a range 192.168.1.0/24, and project B is a consumer Project with a range of 10.10.0.0/24.
- Login into Project A where you want to create publish service.
- In Project A, create a Windows web server with a default IIS site running on port 80
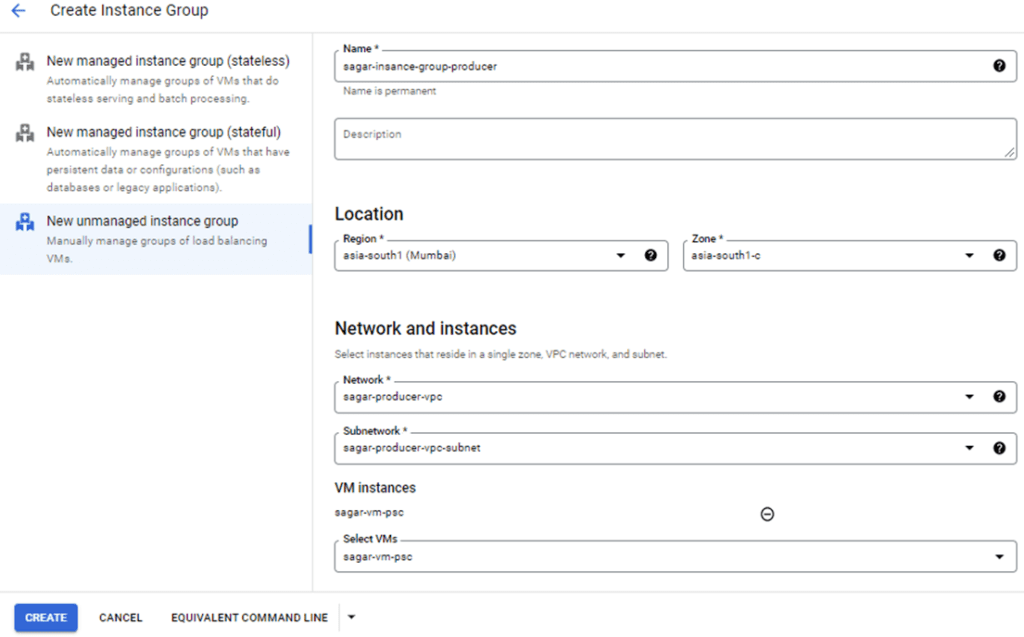
- The next step is to create an unmanaged instance group pointing to the Windows web server.

6. Select TCP L4 Load balancer

7. Create an Internal load balancer

8. Configure the backend service of the load balancer. Select the instance group from the drop-down list and create a health check service for port 80. You can have managed or unmanaged instance groups.

9. Configure Frontend Service of Load balancer, enable port 80 as frontend port

10. Verify LB is created properly and ready for use.
Create Published Service
Inside Project A, Search for Endpoint Service connect in the search box or go to network services –> private service connect. While creating a published service, you have to select TCP internal load balancer created in the previous step, provide a suitable name and then create one RFC/Non-RFC (/29) CIDR range for Internal NAT. You can create it during published service creation or before that as well. If the consumer wants to access the service on the DNS level, you can verify the domain, or else you can keep it optional.


Verify Published service, note down service attachment value

Create Endpoint
Login into GCP Project B where you will create an endpoint via private service connect. Search for it in the search box or go to network services –> private service connect. Go to Connect Endpoint section, and click on it to open. Select the Published service option out of three; put the value, noted down from the previous step. Provide name, select network, and subnet as well. You have created static private internal IP from a given range or a different range, which is fixed


Verify the Endpoint.

Test the service
Login into VM from where you need to test the website. Open the browser and put the endpoint IP address as the site IP. The site name is http://10.10.0.3.
When you browse it, the website will open. The request will go to the published service –> load balancer and the request will redirect to the web server.

In the above example, I have shown one way to use Private service connect. An endpoint can be used for All Google APIs and services or all Google APIs and services controlled by service control as well. For published service, you have to either use Internal TCP/UDP LB or HTTP(S) LB.
Leave a Reply