Getting a Private SSL Certificate free of cost
This article will guide you on how to create wildcard certificates for your internal applications without paying an additional amount.
You work for any software deployment project, you deploy code in multiple environments and test it. You test the site with HTTP , not in HTTPS. Why? you need an SSL certificate for it. Getting a certificate for a lower environment could be difficult considering the cost. There is a way by which you can get a wildcard certificate and configure it with your website.
You can implement a PKI solution by using the AD CS (Active Directory Certificate Service) Windows Server role.
PKI (Public Key Infrastructure) is the combination of software, encryption technologies, processes, and services that enables an organization to secure its data, communications, and business transactions. PKI relies on the exchange of digital certificates between authenticated users and trusted resources. You use certificates to secure application and system. It manages credentials from users and computers, inside and outside of your organization.
AD CS Windows Server role enables scenarios like secure wireless network, virtual private network, internet protocol security, network access protection, and encrypting file system.
Today we are going to see how to generate a wildcard certificate. There are two methods: one method is to generate it by using IIS with Internal CA, and another method is to create a wildcard certificate by using MMC with internal CA. Let’s look at these one at a time:
Pre-requisites:
1. AD and DNS roles running on Windows server 2012.
2. AD CS role configured (CA + CA Web Enrollment) on standalone windows server 2012.
You can refer to the “Building Certificate Authority Server” blog to understand how to set up a CA (Certificate Authority) server.
Deployment Step
First Method :
1. Login into the application server, open the IIS console, and click on the server certificate under the server name:

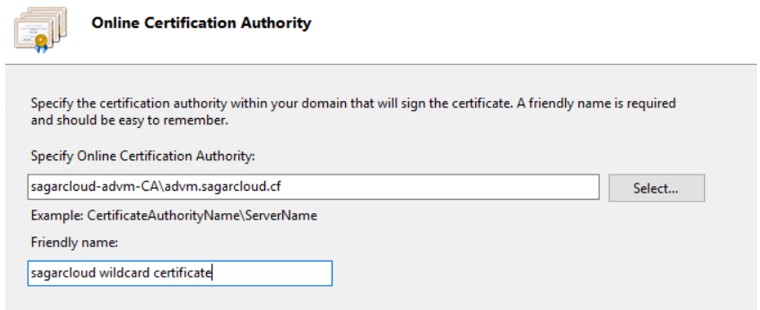
2. Create a domain certificate as shown below.

3. Select Certification Authority and give it a friendly name.
4. Validate the certificate.

5. Bind the certificate on your website. Select the default website, click on Bind. Choose type HTTPS and wildcard certificate which you have created.

6. Make an alias entry on the DNS server to point to the app server where you have installed the certificate.

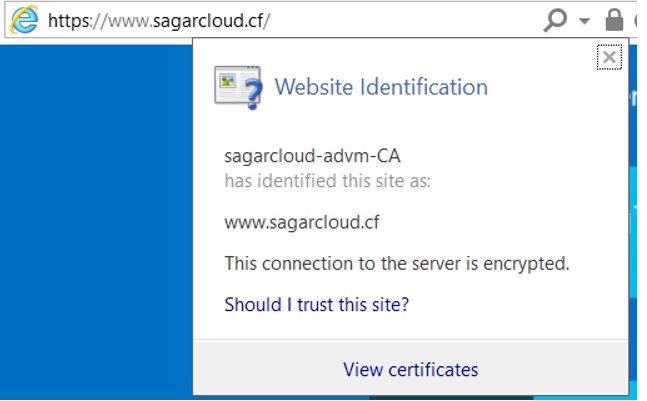
7. Now you can browse the site on HTTPS. Click on the lock icon on the browser, you see the valid certificate issued by the internal CA.
====================================================================
Second Method:
1. Login into the Application server and open the certificates MMC snap-in and add certificate snap-in.

2. Select a computer account for certificate management and select the local computer to open the console.
3. Right-click the Certificates folder, which is found under the personal folder. Select All Tasks > Advanced Options > Create Custom Request

4. In the Certificate Enrollment Page select Custom Request > Proceed without enrollment policy, and select Next step.
5. In the Custom Request Page select (No template) Legacy key from the drop-down and select Next.

6. On the Certificate Information Page, expand the Details link, select the Properties button.
7. On the General tab, complete the Friendly name field and optionally you can add a description for the certificate. Add info in the subject tab like common name for wildcard certificate (*.sagarcloud.com), OU, Organization, State, Country.

8. Select the Extensions tab, In Key usage select Digital and Key encipherment.

9. On the Private Key tab set the key size to 4096, and select the option “Make private key exportable.”

10. Click ok, next, and finish. Save the requested file on a local drive. Now you have created a certificate request. The next step is to generate the certificate.
11. Login into the CA server and browse your internal CA web enrollment page (http://localhost/certsrv/Default.asp ) and click on the request a certificate.
12. Click on advanced certificate request:
13.Refer Step #10. Copy all the data from requested file and paste it saved request box. Select web server and click on submit.

14. Request is submitted, it will offer to download the certificate. Select base 64 and download the certificate. Copy the certificate on the client machine where you raised the certificate request.
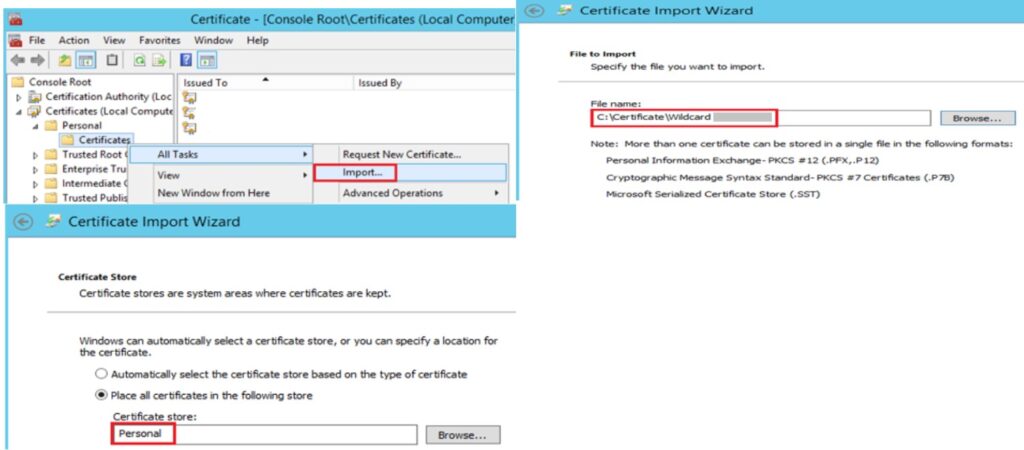
15. Connect to the client machine and open MMC. Right-click the Certificates folder in the personal folder store and select import to the certificate. You will get the import was successful message.
If you have performed all the above steps successfully, open the certificate and you should have a valid wildcard certificate. I hope this article will help you to implement the same in your Organization. Thanks for reading the article.