Enable SSL on SQL Server
Today we are going to see how to make SQL server more secure with certificate.
Pre-requisite:
- Certificate Authority server running in your environment
- CA server is reachable to SQL server
- SQL server version grater than 2012
In our case, we have installed the Certificate Authority role on Active directory .
Note: If you want to know how to install the Certificate Authority role on the Active directory, please refer to my blog –
Installation steps:
1. Login into SQL server with administrator priviledge
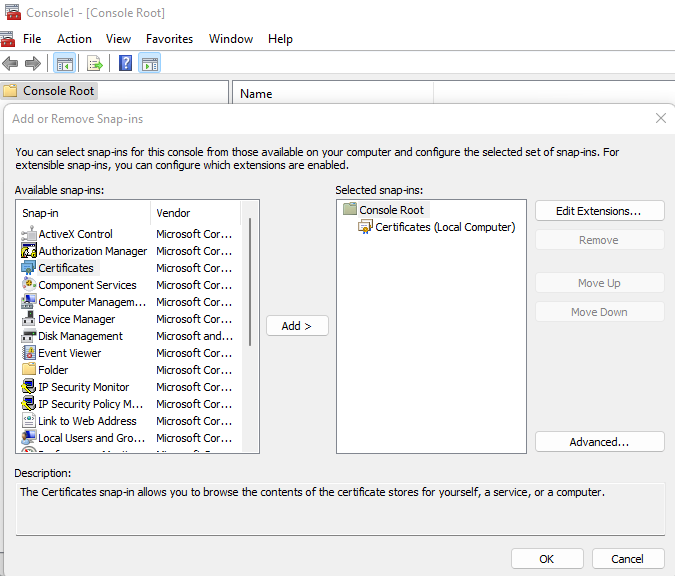
2. Open MMC console –> File –> Add/Remove Snap-in –> Select certificates –> Add
3. select a computer account out of three options to manage certificates. And then select local computer and click finish and ok
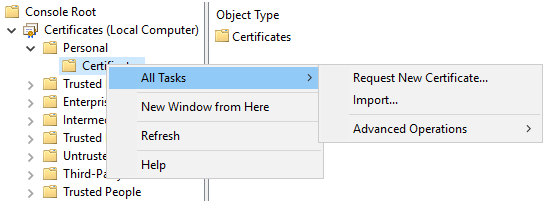
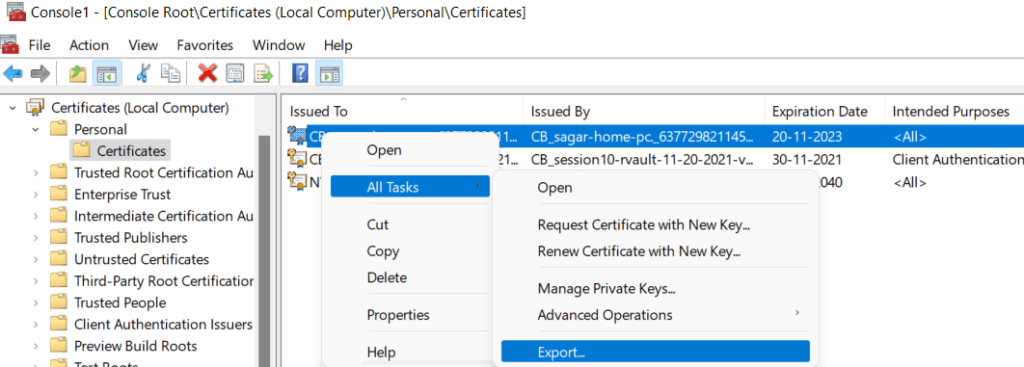
4. Expand personal –> All tasks –> Request New Certificate
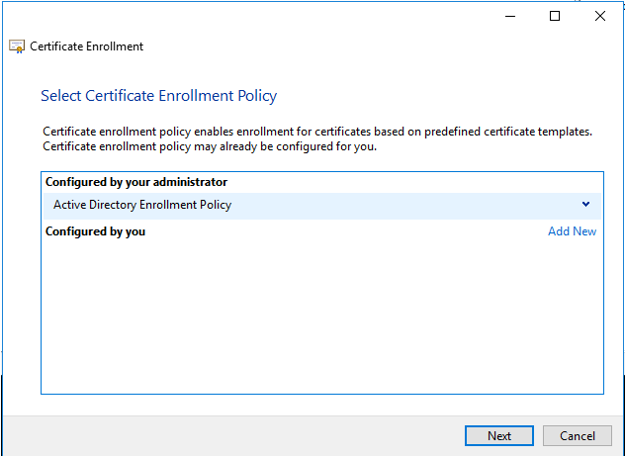
6. Next step is to Enroll
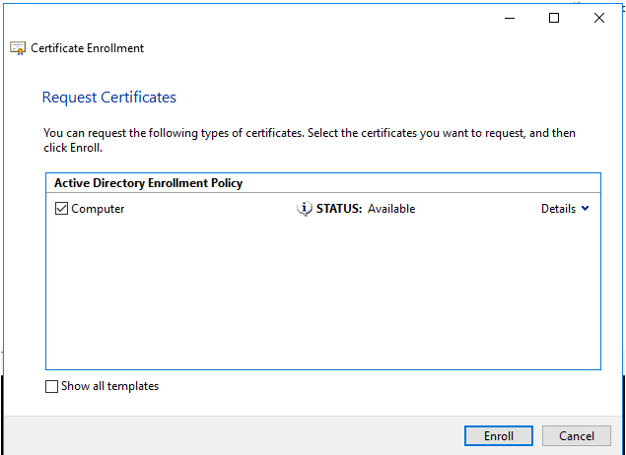
7. Certificate will be added to the personal store
8. Next thing is to enable SSL on the SQL server,
9. Open SQL Server Configuration manager
10. Select SQL Server Network Configuration –> Protocols for MSSQLSERVER
11. Right Click to open properties and click on Force Encryption
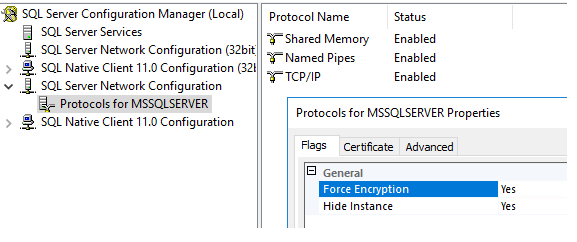
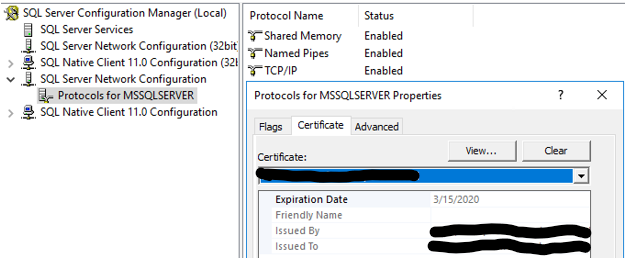
12. Select a certificate from drop-down list
14. Choose the option , Do not export private key,
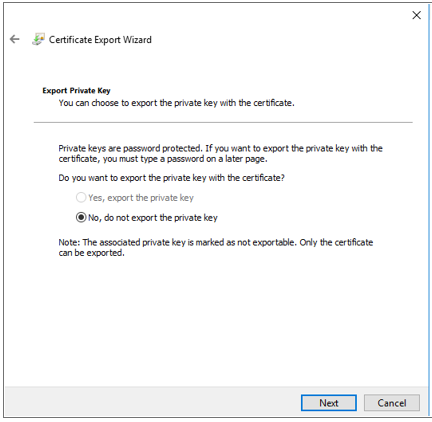
15. Select Base-64 encoded X.509 (.CER) format
16. Store the certificate locally on SQL Server. This will complete the Certificate Export Wizard.
17. This certificate is to be copied to Client machine from where you connect to the SQL server.
18. After coping the certification on the client machine, double-click on it to install it.
19. After installation, the certificate will be visible on the personal store of client’s machine
20. Once installation is complete. you can connect to the SQL server via SSMS (SQL Server Management Studio) Client.
I hope the above steps will help to make your SQL secure so only authorized client machine can access it.