Setup Office365 for Your Company
Today we are going to see how to set up Office 365 in the company. I have explained the steps in a simple way so anybody can understand. You also need to understand the importance of DNS records in this setup.
High-Level Steps:
A. Purchase Office 365 product
B. Setup public domain and DNS hosting for mails
C. Create a user and attach an office 365 license
D. Mail User Testing
A. Purchase Office 365 Product
1. Consider you already have an azure subscription with global administrator rights
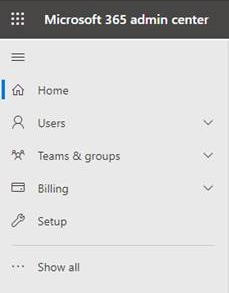
2. Login into M365 Admin Center with the same credential that you used for the azure portal login
3. Browse to admin option to open Microsoft Admin Center

4. Go to billing section and expand it
5. Search for the required office product in Purchase services and click on Buy it. For example, I have taken E3 developer license
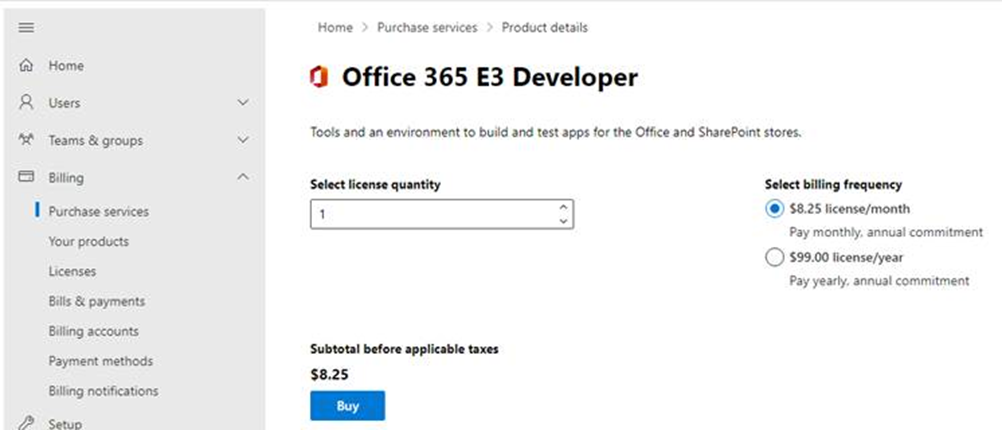
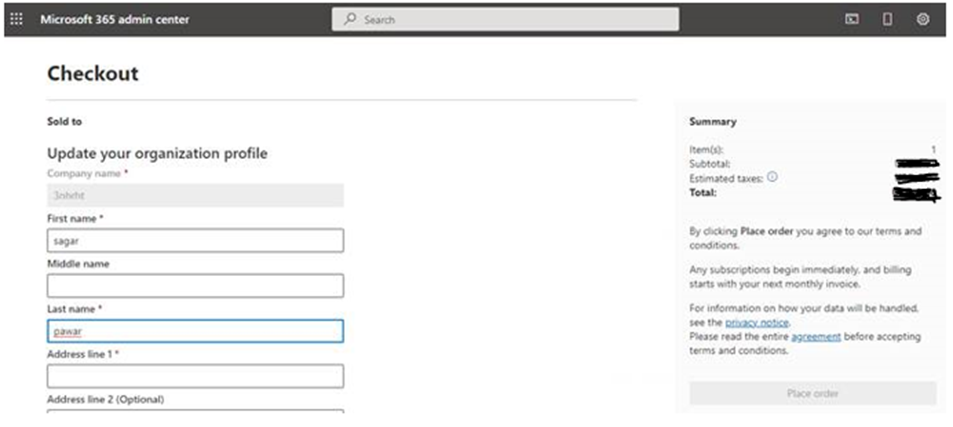
6. When you click on Buy, it will re-direct to the billing page to link it to the billing profile and place an order
7. Once billing is done, you can go back to Your Products status under billing to check current status

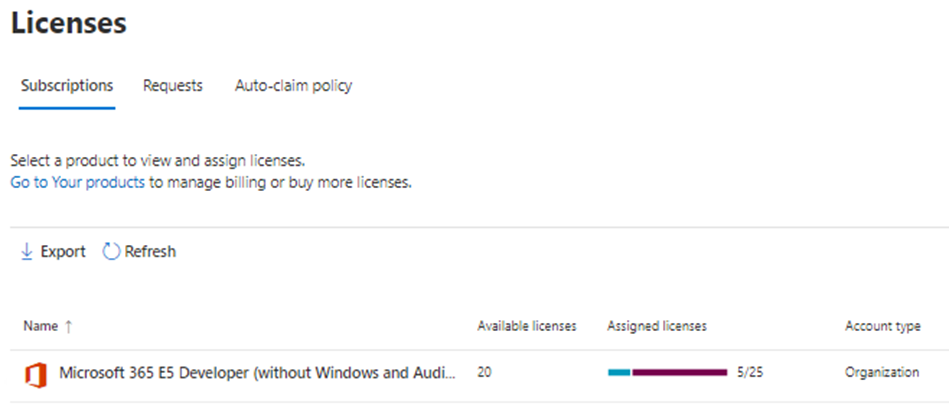
8. Next Verify the status of the license in the License category under billing. In my case, I have used 5 licenses already hence it is showing some number, in your case, it will start from 0 count
9. In Bill & Payments category, you will find invoices, Payment methods and Billing profiles.
Invoices provide a summary of your charges and instructions to make payments.
Payment methods pay for subscriptions or are associated with billing profiles
Billing profiles include a payment method, contact info, and other invoice settings. When you buy products, you pick a billing profile to cover the purchase.
10. There is another section, i.e. Billing accounts manage your purchasing relationship with Microsoft. Each billing account contains defining info about your organization, like addresses, contact info, and any tax info that applies.
11. Via the Billing Notification category, you can set up billing notifications to be sent to your admin.
B. Setup public domain and DNS hosting for mails
1. Login into the Azure portal
2. Go to Azure Active directory service, and add a custom domain that is the public domain of your company. In the below example, spcloud.cf is my public domain.
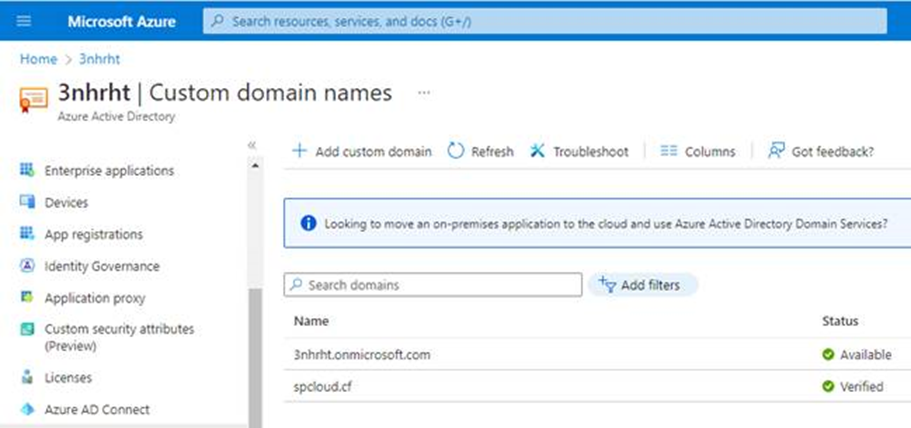
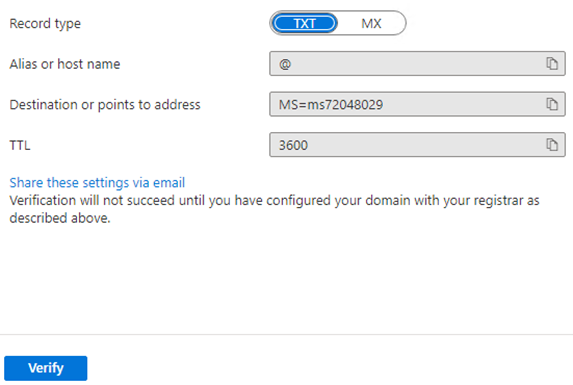
3. When clicking on add custom domain, it generates txt records which you need to add into Domain registrar which provides domain hosting facility. You can also host this to your company’s external DNS server or Cloud DNS service.
4. Only thing is to remember here if you are adding DNS records with the domain registrar from whom you have taken the domain.
Note: If you have decided to add records to an external DNS server or Cloud DNS, then you have to update the name server IP address of that DNS server first. I have added the TXT records on Azure DNS for hosting.
5. After adding records, come back to the custom domain, and click on verify ( Refer step #3 in this section) button. It will fail due DNS sync usually takes 12-24 hours to update
6. This step is manual so you have to again click on verify until you get the verified status
7. Now login into M365 Admin center, go to setting –> domains
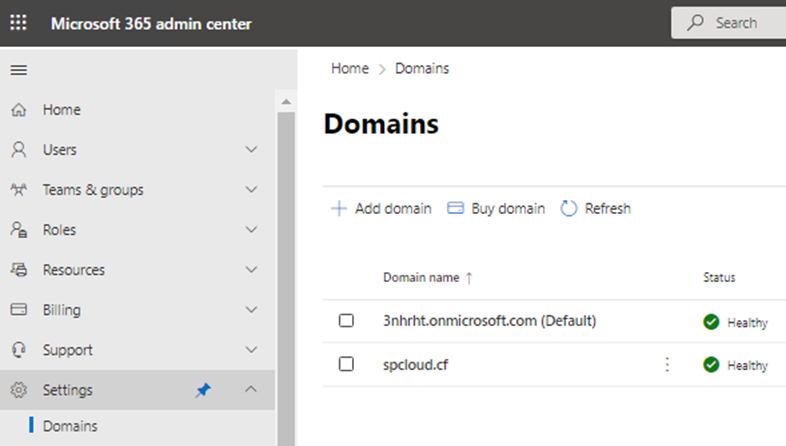
8. You have to add a domain manually, it will verify first if the custom domain is already verified or not
9. If yes, then it will automatically generate records for MX, SPF, and auto-discover
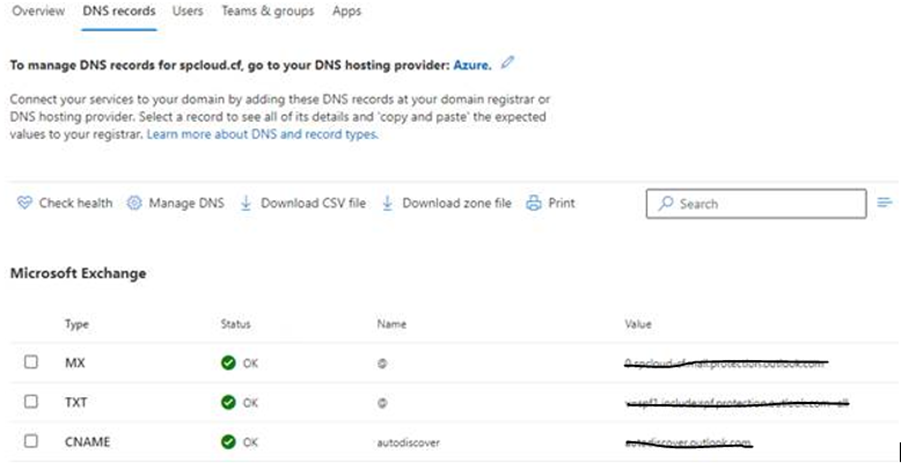
Note: To provide additional security to the mailing system, it is always good practice to add DKIM and DMAC records
10. You need to add those records to the domain registrar from whom you have taken the domain. Next thing is to connect to the domain and complete the setup. Below is the final output after adding records and connecting to the domain successfully.
Note: If you have decided to add records to an external DNS server or Cloud DNS, then you have to update the name server IP address of that DNS server first.
C. Create a user and attach an office 365 license
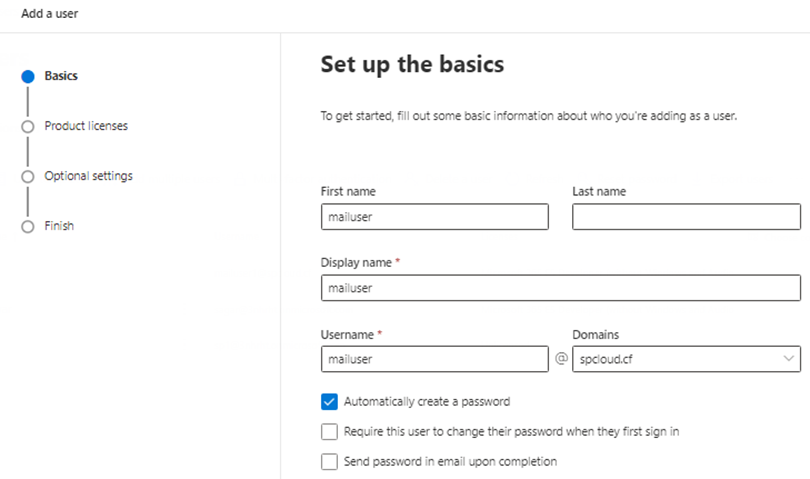
- Go back to the user section of the M365 admin center if you want to create one user, you can go to the active users category under users. Click on add user. Under the basic setting, provide the user name and also setup how you want to set the password out of three or all three.
- Note : At the Organization level, nobody creates users manually, they use CSV format to import all users and then assign a license
- Some organizations usually take a hybrid approach where they sync all their users via the direct connect tool of Azure AD and then assign licenses to them.
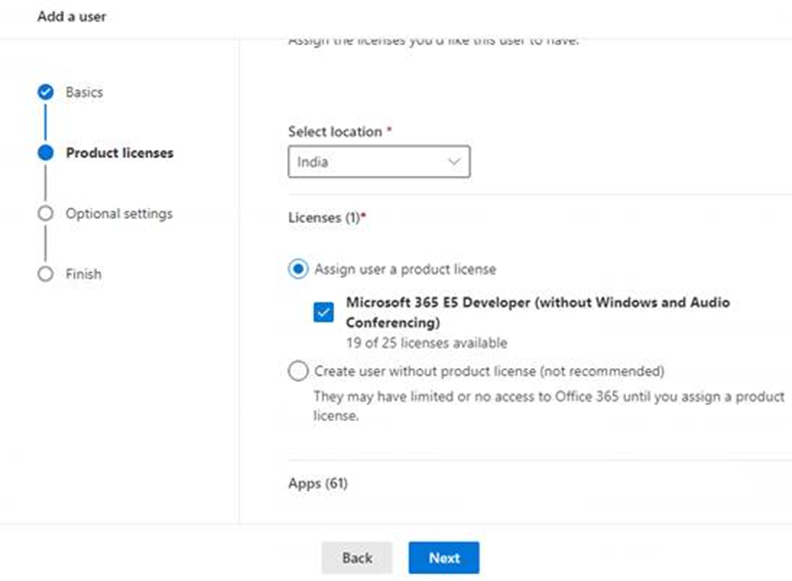
2. Next thing is to assign the product license to the user along with the user location and click next to complete the onboarding process.
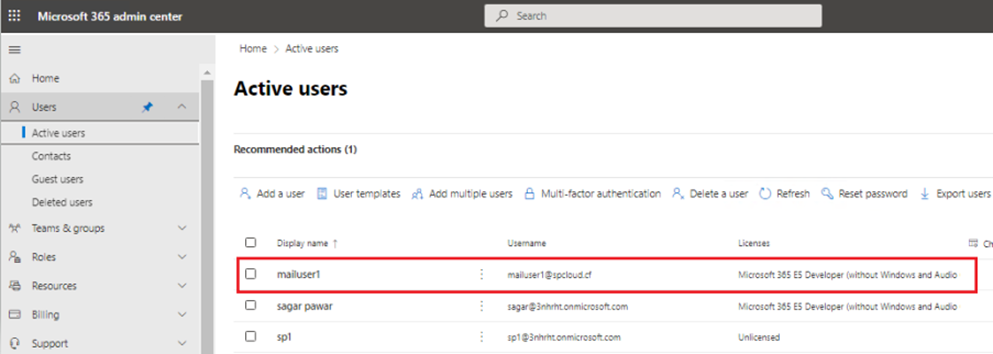
3. New user is created
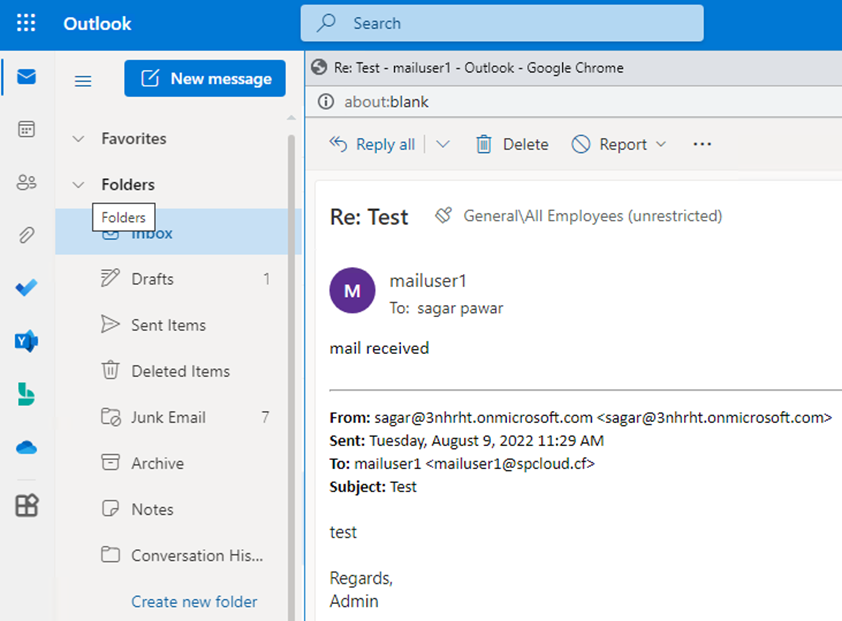
D. Mail User Testing
1) Either you can open webmail or download office suite to set up your account.
–
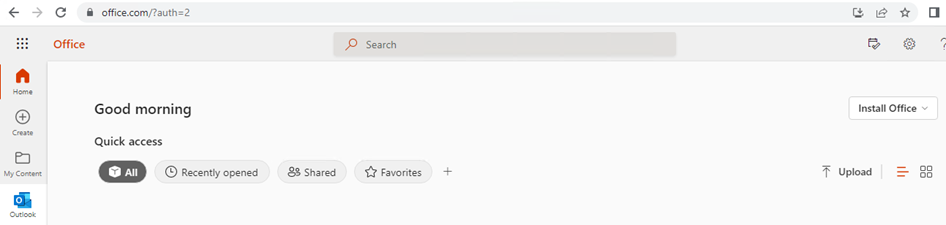
2) I opened web mail here with mailuser1@spcloud.cf. When you get new account, you also need to set MFA in 14 days otherwise it will be applied forcefully.
3) Test mail send and receive.
I have covered almost every part of this setup. I hope you will enjoy it as much as I enjoyed it during testing and writing. Happy Learning.