AppDynamics Controller Installation Step-by-Step
AppDynamics is capable of monitoring servers, applications, and databases. It has very advanced monitoring features to give your in-depth knowledge of your application. It supports on-premise and Cloud applications.
Today we will see the step-by-step installation of the AppDynamics controller.
Pre-requisites
- AppDynamics uses ports 8090, 9191, 3388, 8181, and 8080. Check your firewall and ensure these ports are opened to install AppDynamics. This will enable the controller to communicate with the agents on these ports.
- Make sure to have Adobe Flash Player installed on your machine as well.
- Please ensure that you have .NET Framework 3.5 and .NET Framework 4.0 installed on the server
Controller Installation Steps
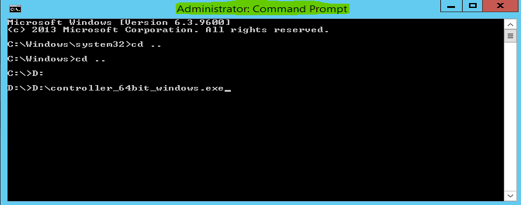
- Download the AppDynamics Controller (controller_64bit_windows.exe) from https://download.appdynamics.com/
Note: If you do not have an AppDynamics account, please create a free account https://portal.appdynamics.com/account/signup/community/
2. As we are going to install it on a windows machine, select 64-bit version.
3. Download the controller exe, launch the installation wizard from Command Prompt with Administrator Privileges.
4. On the welcome screen, click next, accept the terms
Note: Read through all the terms and select Yes to proceed.

5. Select the default destination directory for installing AppDynamics and click on Next.
6. AppDynamics installation will begin and usually takes about 40 min – 1 hour to complete the installation
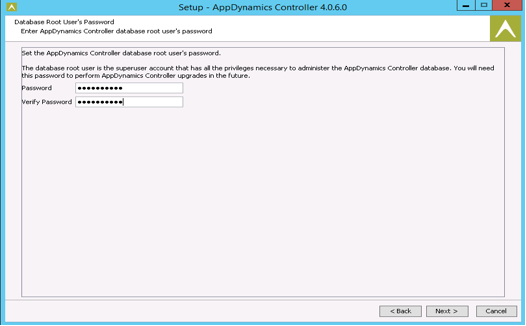
7. Next you will be asked the to enter Database Root User’s password.
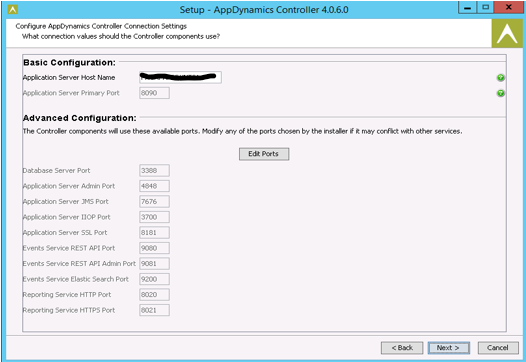
8. Enter the host server name (this will act as controller server) and click on Next
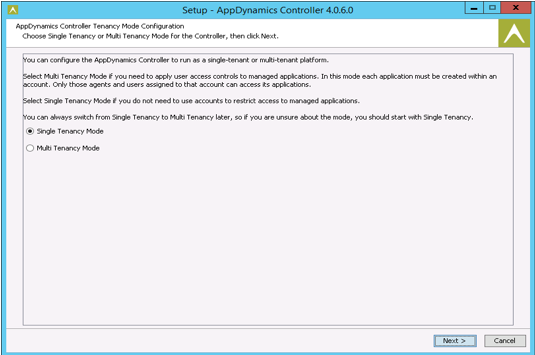
9. Select Single Tenancy mode for non-clustered environments
Note: Tenancy can be changed from single to multiple and vice-versa at any point of time post-installation).
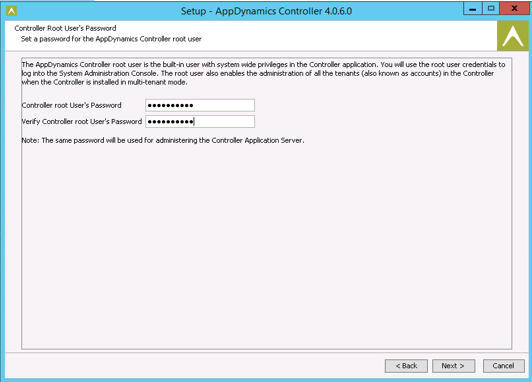
10. Enter the Controller Root Password
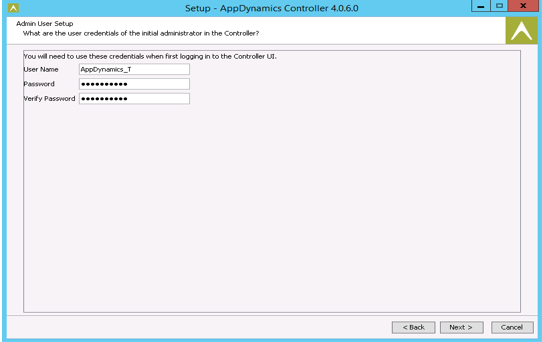
11. You will be prompted to enter Admin User Credentials. These are the same credentials you will have to enter upon logging into the AppDynamics Controller
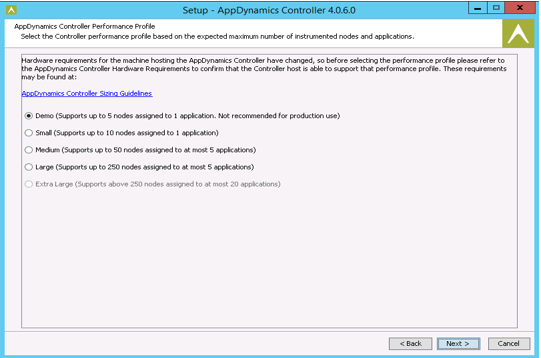
12. Select Demo for Test servers and Small\Medium for Production Servers depending on your license type
13. Leave the default setting of the data directory path.
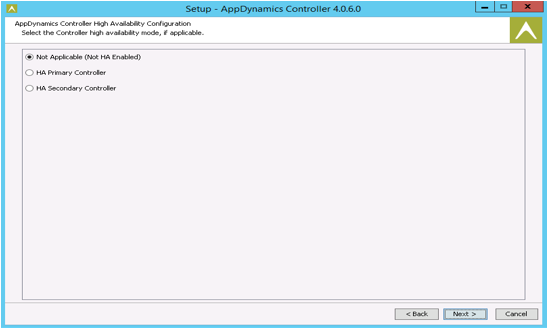
14. Select Not applicable if you do not want a high availability option. ( You can select HA for Prod/DR workload)
15. Once AppDynamics controller installation is complete. it will give you a URL to connect http://<server name>:8090/controller
16. the final step is to copy the AppDynamics license file to the application installation folder. Restart the application.
====================================================================
Find troubleshooting steps for your day-to-day operation.
Issue 1: Controller slow performance and not responding.
- Make sure that you are meeting system requirements for the selected profile (small. medium, large, extra-large)
- Verify no other high memory-oriented process is running on this system
- Check controller config property in “response.varfile” located under <controller-home>/.install4j
Issue 2: AppDynamics controller not opening
- Check logs in <controller-install-dir>\logs directory.
- run the command “netstat -ano | find <port no>“to check required ports are opened
- Restart app server services
The above information will help you with AppDynamics controller installation and troubleshooting.