Replacing Traditional Jump Server with Azure Bastion Host Service
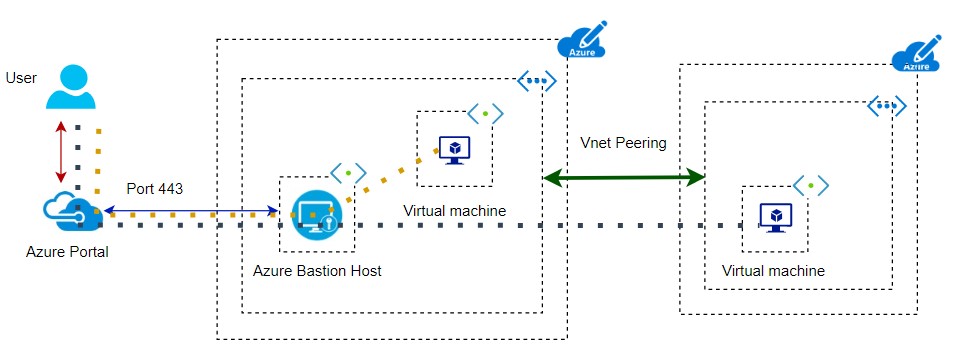
Earlier there was a jump server requirement in every infra build to access servers on private IP remotely. Rather than exposing a private subnet over internet, it is always recommended to have a jump server with public IP in between. All Remote connections will land on it over the internet. Once the user is authenticated, then the user can use SSH or RDP tools to connect to respective servers.
Later Company started to enable MFA on top of the Jump server to provide additional security to remote connection.
As it was applicable to on-premise instances, similarly It was being used in Cloud as well. Cloud providers found challenges with traditional jump servers like auto-scaling of instances, vulnerability on ports 22 and 3389, custom port configuration, and data transfer. They brought Cloud native Jump server.
Today we will see Azure Native jump server service. The service name is Azure bastion host. It is Azure Managed PaaS-based service.
3 Ways to enable Azure Bastion host
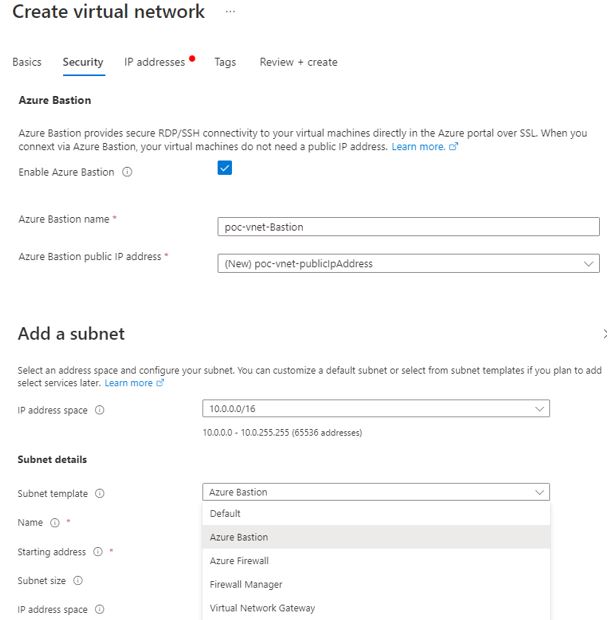
- While setting up Virtual Network
- When you want to use it on Azure VM console
- Create service through service console.
Azure Bastion host needs a dedicated subnet. The subnet name is fixed and that is AzureBastionSubnet. The subnet range can not be lesser than /26. This range is required to place Load balancer with public IP and bastion host instances. You can expand instance count on need basis within the subnet. Price is based on SKU size, additional instances, and outbound data transfer. It is not recommended to apply NSG on the bastion host subnet as all communication takes place on port 443.
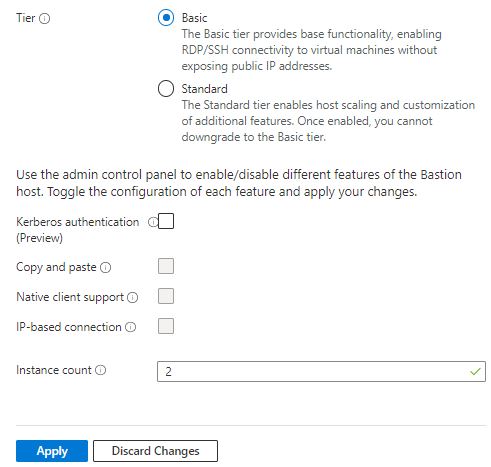
There is one more option that I can enable is Just in TIME (JIT) so that a remote connection will be available for a shorter duration after access request gets approved. You can allow the IP range of the Bastion subnet as a source. You can scale bastion host instances between 2-50.
You will notice two types of SKU, Basic and Standard.
Basic SKU – only supports Linux on SSH and windows on RDP protocols. You can keep your key in keyvault service and use it while logging.
Standard SKU – Along with basic functionality, it supports the Native tool. I will show that in the demo. You can transfer file in-out. It supports IP-based functionality, It means that I can connect servers outside the Azure cloud on a Private IP address. But you need hybrid connectivity. You can extend connectivity to other clouds as well. Custom port support is available.
You can upgrade from Basic to Standard at any time but you can not revert back. See the difference between Basic and Standard below.
I have allocated /26 range with a fixed subnet to start with it in below screen. You need to create public IP of your bastion host manually.
When you install Azure bastion host in your VNET, it will not be enabled for all windows or Linux VM automatically. You have to open VM panel, go to the left side blade and click on connect. Click on the Use Bastion tab to enable it. It will detect bastion of that VNET automatically.
There are two methods to connect to windows. In first method, you can use local username and password to login. Create a key vault, and generate secrete as the user’s password as shown in 2nd method. With KeyVault, operation team does not need to know credential to login. So no password sharing is required.
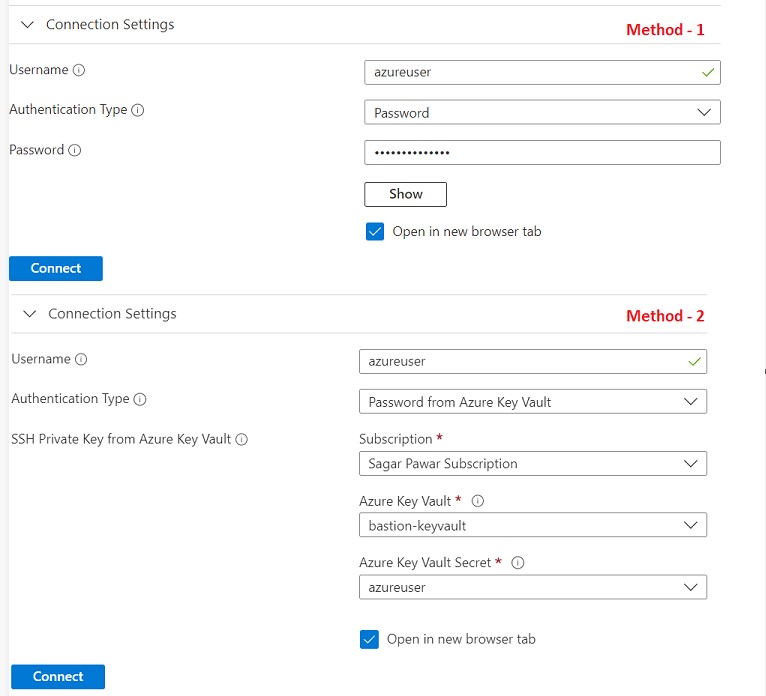
Similarly to Linux, you have four methods, you can access VM via SSH key or password. You can store them in KeyVault and access them from it.
You can extend your Bastion to other VNET where the Bastion host service is not deployed but make sure VNET of the Bastion host is peered with other VNET of the same subscription or other subscriptions of the same tenant or another tenant. When you peer with VNET of other regions, you need to check the latency due to the long distance between them.
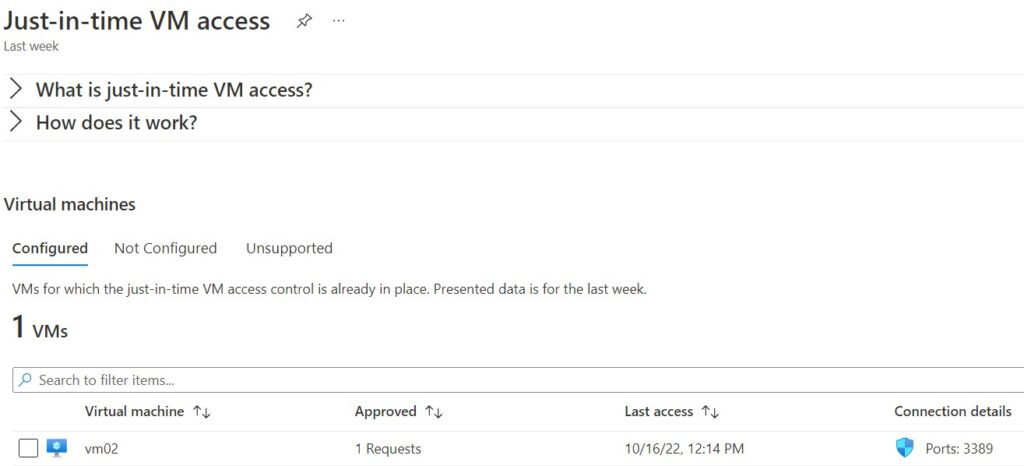
To provide more control over your VM, you can enable Just in time (JIT) access on your VM. I have added the Bastion host range to allow. This option is available on the VM console under the configuration setting. When you enable the setting, the Just in time NSG rule will be applied on your VM to deny all traffic. Access will be provided on a request basis for a short duration (Between 1 to 24 hours). The default value is 3 hours. You can use Bastion host to connect VMSS and Dev/test Lab VM
Native tool for Windows VM
We will see now how to access VM running in Azure via Bastion host but with native tools. As primary step, you need to login into Azure Portal.
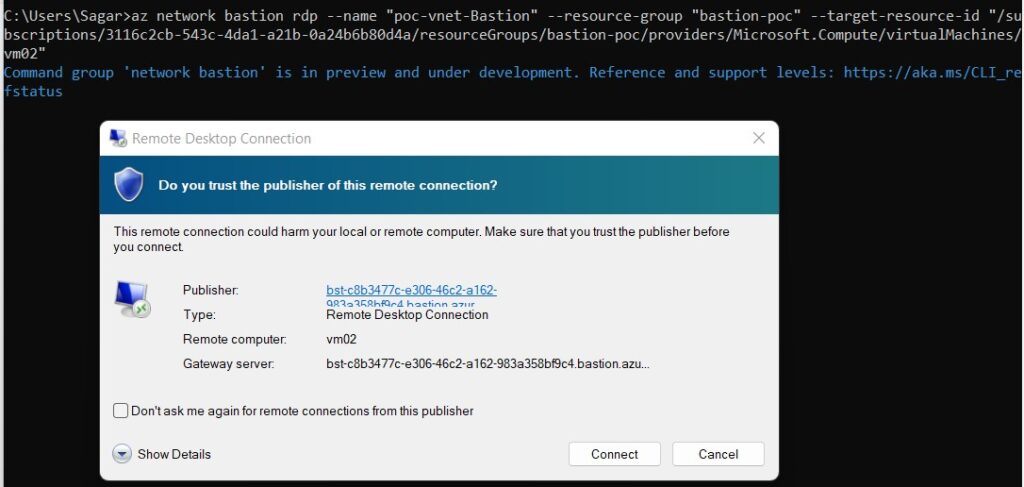
Run the below command to access Windows VM with Azure Bastion host. You will resource group name, and Bastion hostname from the Azure portal. To get VM resource ID, you need to check the VM properties on the console. after running the command it will ask for the user name and password. You can pass a username and password as additional parameters. Once you are connected, you can copy and paste files from/to windows VM. If you have enabled Azure AD integration on your windows VM, you can connect with Azure AD parameters.
#az network bastion rdp --name "<BastionName>" --resource-group "<ResourceGroupName>" --target-resource-id "<VMResourceId>"
Native tool for Linux VM
While running az network bastion ssh command, you may face an issue if SSH extension is not installed. you can run a command to verify and run the command.
#az extension add –name ssh
Now execute the below command to connect to Linux VM.
#az network bastion ssh –name “<BastionName>” –resource-group “<ResourceGroupName>” –target-resource-id “<VMResourceId>” –auth-type “password” –username “<username>”

To transfer files, you need to use the SCP command between the local machine and Linux VM as shown below.
#az network bastion tunnel –name “<BastionName>” –resource-group “<ResourceGroupName>” –target-resource-id “<VMResourceId>” –resource-port “<TargetVMPort>” –port “<LocalMachinePort>”
#scp -P <LocalMachinePort> <Local machine file path> <username>@127.0.0.1:<target VM file path>
Bastion Shareable Link
The Bastion Shareable Link feature lets users connect to a target resource (virtual machine or virtual machine scale set) using Azure Bastion without accessing the Azure portal. It is is currently only available for resources in the same virtual network and/or in peered virtual networks within the same subscription and region.
This is how you can setup bastion host and connect to VM securely, I hope you would have enjoy this article. Looking forward to your feedback and comments. Keep learning and growing with Multi-Cloud Sagar.
Leave a Reply