AppDynamics Agent Installation step-by-step
AppDynamics agents are plug-ins or extensions that monitor the performance of your Server, Database, and application. The agent collects data and sends it to the controller to analyze, report the issue and provide a beautiful dashboard for the customer or IT Support team.
Appdynamics provide a long list of agents. You will find the agent list on the AppDynamics site. I am providing the link here – https://docs.appdynamics.com/appd/22.x/latest/en/application-monitoring/install-app-server-agents
Out of which, we will see today how to install .DotNet agent on a Windows machine to monitor Applications. Let’s see what is pre-requisite for it.
Pre-requisite:
- Administrative privilege on App server to install the agent
- The app server should have connectivity with the Controller
- Open ports: 8090, 9191,3388,8181, and 8080 from the controller server to the App server.
- The agent should have the same version of the Controller.
- node name should be unique
- length of application and tier should not be more than 500
- Avoid special characters in the name of nodes, tiers, and application.
Installation Steps
- Download the AppDynamics .NET Agent from https://download.appdynamics.com/ on your machine
2. Extract the agent software and copy it to the App server where we are going to install .NET Agent.
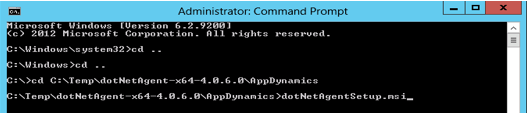
3. Install the agent from command prompt with administrator privilege
4. On the first screen, accept the End user agreement and click Next
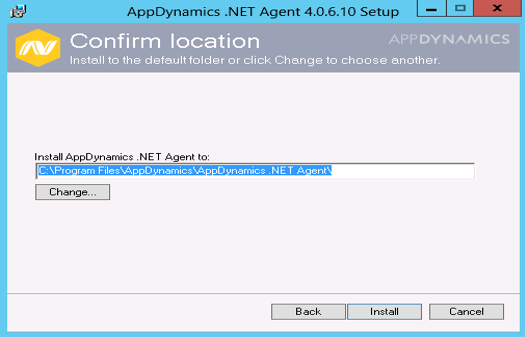
5. Keep the default setting of the application folder and click install.
6. Next you will be prompted to launch the AppDynamics Agent Configuration window, select the launch option and click Finish
7. Bypass the initial Configuration window by clicking Next
8. select the user/service account, you would like to write permission on the log directory and click next
9. Confirm the selected accounts and click Next
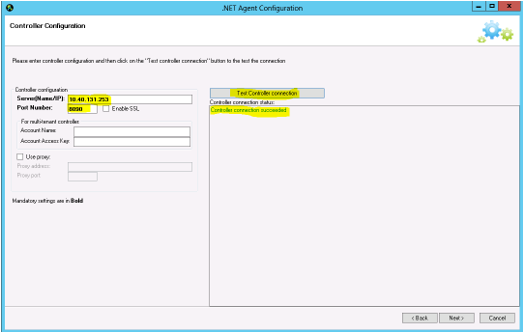
10. On the Controller Configuration screen, enter the Prod Controller IP/Name and port 8090 as shown below. Also, be sure to Test Connection and confirm it is successful before clicking Next
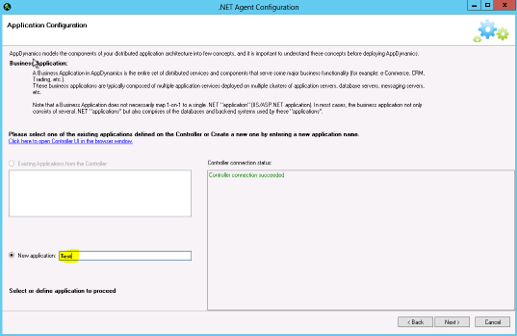
11. Next, name the application as Test or Prod (depending on where you install the agent) and click Next.
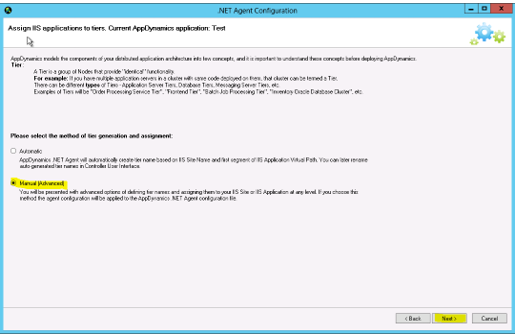
12. Choose the Manual (Advanced) tier generation method as shown below and click Next
13. Create application tiers and assign them to the IIS Application as shown below. Ensure the tiers are assigned as per your configuration needs
14. On the Configuration Summary, check the configuration details and select the option to perform an IIS Reset
15. Confirm the configurations were successfully applied and click Next
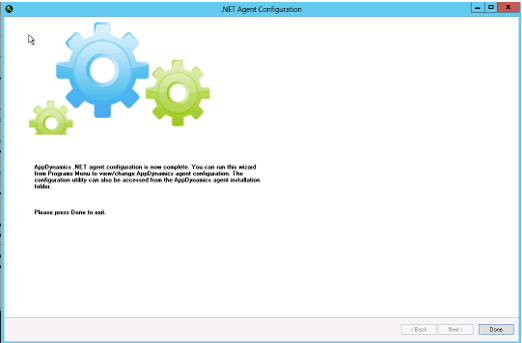
16. This step concludes AppDynamics Agent Configuration. Click Done
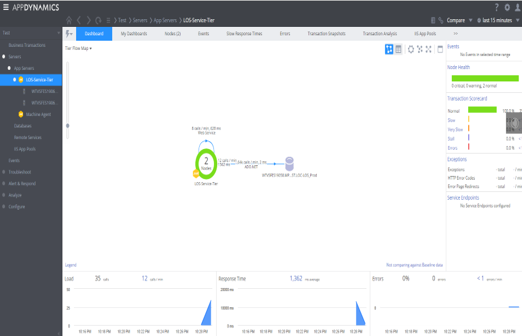
17. Once the agent is installed, log into the AppDynamics Console and confirm you are able to see some data being pulled from the agent
18. Restart AppDynamics.Agent.Coordinator_service Service.
Similarly, we can install agents for standalone, SQL DB, Oracle DB, and Tomcat applications. Documentation for agent installation has been provided on the Appdynmics site.
Leave a Reply