Achieve Hybrid Identity in Azure Cloud with AD Connect
When your organization has a hybrid infrastructure containing on-premise and cloud applications to support. Managing users both on-premise and in the cloud can be challenging. You can leverage Microsoft’s common hybrid identity for authentication and authorization. With help of AD Connect tool, you can achieve it with anyone synchronization method out of three available methods (Password hash synchronization, Pass-through synchronization, and Active Directory Federation Service). It also provides single sign-on capabilities.
Azure AD Connect Architecture look like
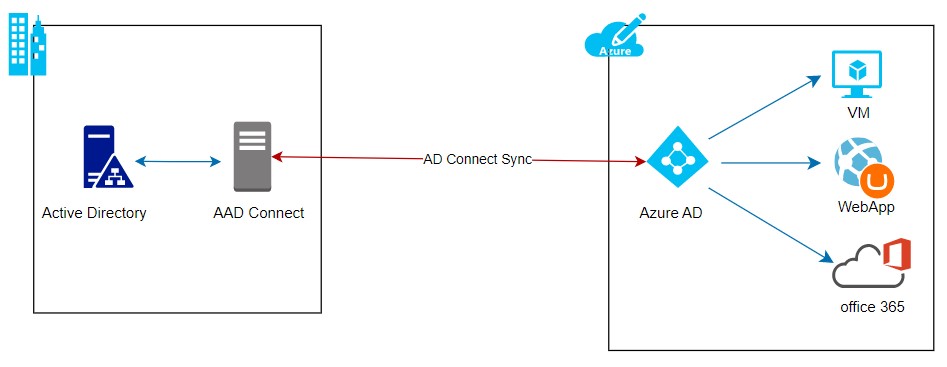
It brings the following advantages
- Organizations can provide a common hybrid identity for on-premise and cloud resources
- With a common hybrid identity, users can connect to Microsoft SaaS-based products like Office 365, in tune, dynamic CRM, or third-party applications
- Developers can develop applications with a common hybrid identity model
- Provides better control for applications, devices, user, and user location by using conditional access
With the below demo, you will get more insight into the AD Connect setup
Pre-requisite for AD Connect Tool:
- Azure AD Portal access with Global Administrator permission
- Require public domain to configure in Azure AD
- Need separate server with windows server 2016 to install AD connect tool
- Need on-premise Enterprise Admin permission
- Forest functional level of on-premise AD must be 2003 or later
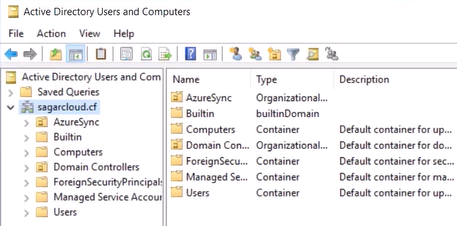
We have set up on-premise AD with sagarcloud.cf domain
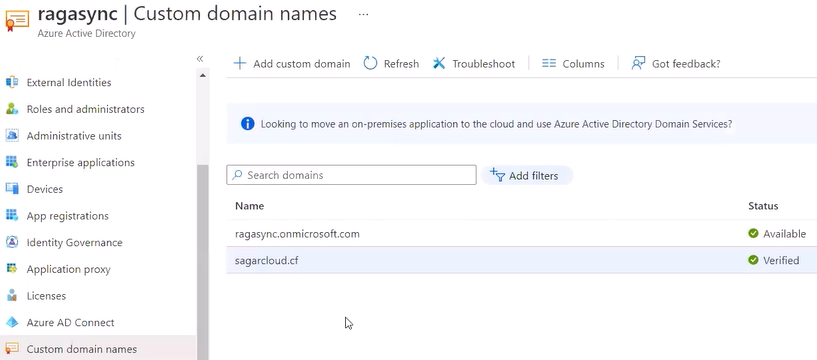
Further, We have an Azure AD tenant with the name ragasync.onmicrosoft.com in Azure AD.

Step 1: Setup Custom Domain in Azure AD
1. Login into the Azure portal
2. Go to Azure Active directory service, and add a custom domain that is the public domain of your company. sagarcloud.cf is the public domain that we are going to set up.
3. When clicking on add custom domain, it generates txt records which you need to add into Domain registrar which provides a domain hosting facility.
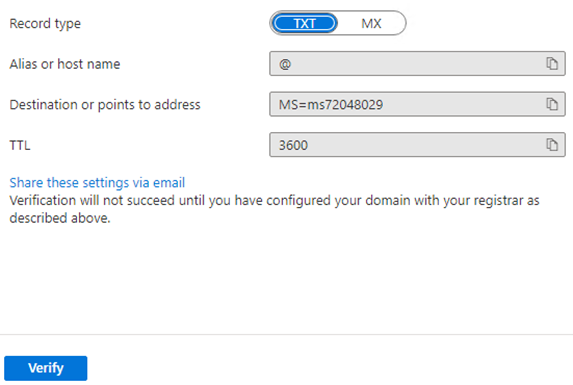
4. Only thing is to remember here if you are adding DNS records with the domain registrar from whom you have taken the domain.
Note: If you have decided to add records to an external DNS server or Cloud DNS, then you have to update the name server IP address of that DNS server first. We have added the TXT records on Azure DNS for hosting.
5. After adding records, come back to the custom domain, and click on verify ( Refer step #3 in this section) button. It will fail due DNS sync usually takes 12-24 hours to update
6. This step is manual so you have to again click on verify until you get the verified status
Step 2. Setup AD Connect
- On the Azure Active Directory page, go to Azure AD connect option, You need to download AD connect to tool.

2. You can download tool either on AD server or you can take new windows AD joined VM to keep separate AD Connect server. After downloading, double-click on setup. Accept the Agreement and continue. Next you will get two options whether you want to go ahead with the Express setting or customize it. When you customize it, you will get additional options. We will go with Express setting.
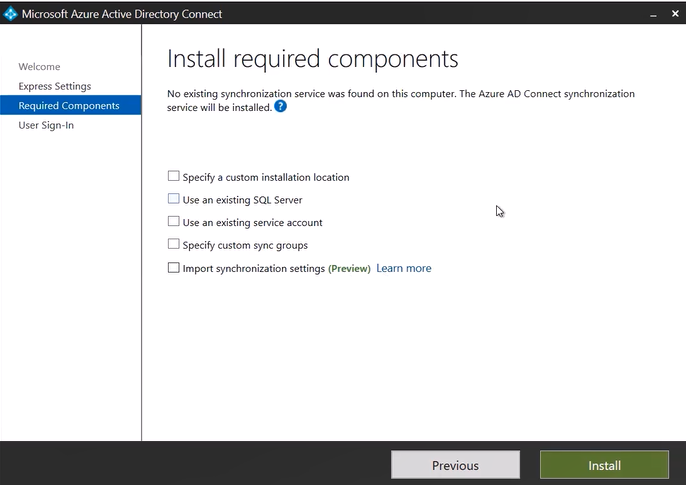
3. Click on install to start the installation process. The user Sign in page will appear where you have to select AD sync option.

Note: Quick Overview of sync methods to choose out of three.
- Password Hash Synchronization – Rather than storing the user password, the Password hash is synchronized with Azure AD. It is the most simple way to enable authentication. No additional infra is required.
- Pass-through Authentication – When a user does AD authentication in the cloud, password validation happens with the on-premise AD server, not with Azure AD.
- Federation with ADFS – Setup Active directory federation server to authenticate users with an external trusted system. Additional setup is required.
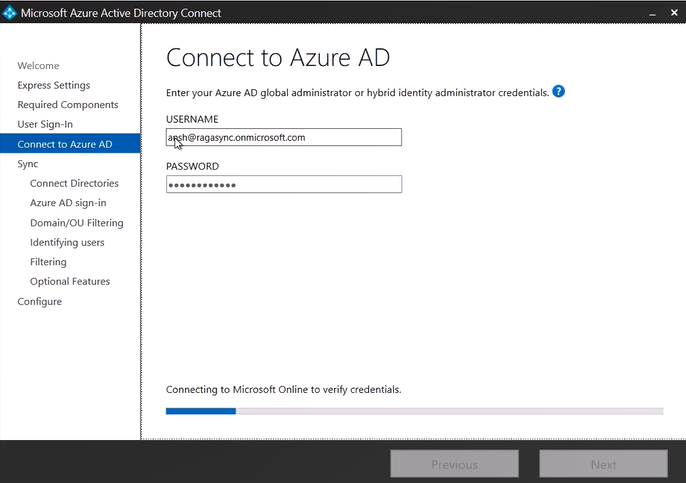
4. Next step is to connect with Azure AD. You can use the Azure AD global administrator account.
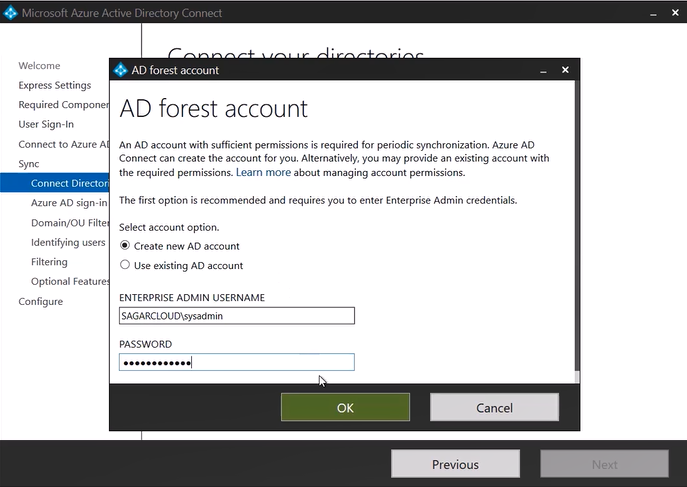
5. Next, We will connect to on-premies AD with Enterprise admin or Schema admin permission
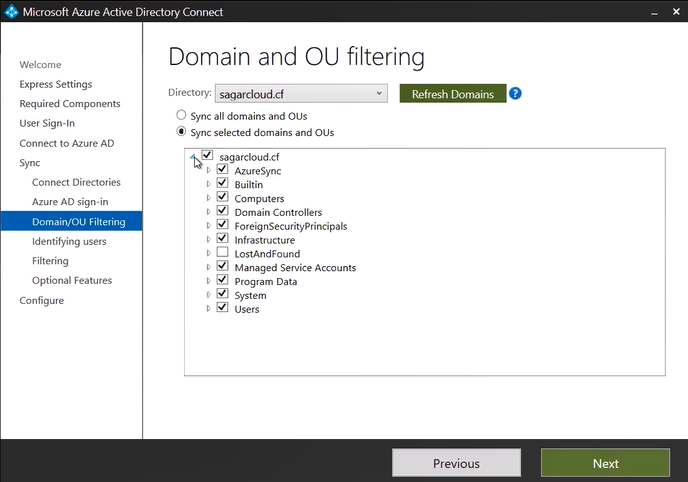
6. Azure AD will verify and then you need to choose which resources of on-premise AD are to be synced.
7. Keep remaining options default and click on install to setup.

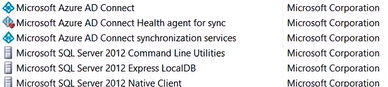
8. After installation is completed, you can check your add/remove program and see what things have been installed along with AD connect in your system. There are three AD connect components along with SQL server express edition. Azure AD Connect sync is the main component of Azure AD Connect. It takes care of all the operations related to synchronizing identity between your on-premises environment and Azure AD. Under AD connect, you will get Synchronization Service UI to configure more advanced options.

9. When you go back to your Azure AD, you will see replication items. in my case, you can see two users are replicated from on-premise AD.

10. AD connect sync takes 30 mins to sync new changes in AD objects. if you want to do it sooner, then you can execute the below PowerShell command after the AD object changes
#Import-Module ADSync
#Get-ADSyncScheduler
#Start-ADSyncSyncCycle -PolicyType Delta
Step 3: AD sync user testing
AD sync users can login into the Azure portal (https://portal.azure.com ) or my apps (https://myapps.microsoft.com) to check access
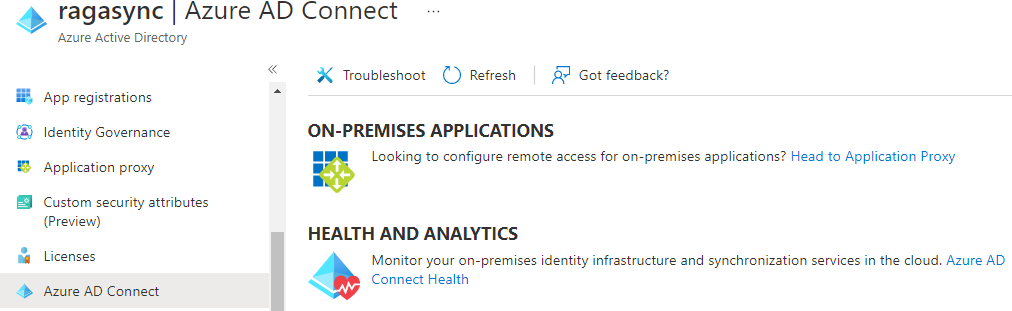
Step 3: Configure and Check health of your AD
You will get Health and Analytics option on Azure AD connect page at the bottom. Click on it to open. To use this feature, there are additional pre-requisites to meet as below
Pre-requisite for Azure AD Connect Health
- Azure AD Premium license
- Ad Connect server requires connectivity to Azure AD Connect Health endpoints
- Firewall TCP port 443 and 5671 need to be opened
- If proxy is in used, then microsoft URLs are allowed

This is how you can configure AD Connect tool in your organization.
Note: In the above Article. we have not shown Pass-through or ADFS synchronization. Also not enabled SSO (Single Sign-on) option during setup.