Azure File integration with Azure AD in a Simple Way
Most of the time Customers use NFS (Network File System) drive in the organization to store and share files over the network with teams. You need the same kind of Functionality in Azure Cloud, Azure File Service is available for your disposal. It works as Distributed File System (DFS), which means you can share a folder/file with multiple users. The client computer has to map the drive and start sharing the data within the team through it. Supports up to 100 TB of storage space with better latency.
To access the shared folder of the Azure file, you need access. You have two native options, Access Key or Share Access Signature (SAS) token for authentication. Need NTFS permission on the Shared folder, that option is also available.
Today I am going to show you a demo of how to perform Azure File AD integration in a simple way. Enabling AD DS authentication for your Azure file shares allows you to authenticate your Azure file shares with your on-prem AD DS credentials.
Pre-requisite for Demo:
- On-premise Windows AD DS environment in sync with Azure AD
- Separate Organizational Unit (OU) to be created in On-premise AD server to add a storage account object
- Domain admin permission to execute PowerShell command for Storage account AD integration
- Microsoft URLs will be whitelisted to connect to Azure subscription for AD integration if the proxy is in a place for outbound traffic
- AzFileHybrid module to be copied in the domain-joined machine to execute the first time
- Owner permission on Azure subscription to give SMB level permission to user or group
- The storage account name length should be 15 characters or less
- AD domain joined client VM
In this demo, the Windows AD server is on-premise. First Validate if Directory sync is in place. If you want to understand how to sync on-premise AD objects with Azure AD, please refer to my blog- https://multicloudsagar.com/hybrid-identity-in-azure/
- On-premise domain – sagarcloud.cf
- Azure AD domain – ragasync.onmicrosoft.com
I have already synced the users, and groups of sagarcloud.cf on-premise domain with Azure AD domain ragasync.onmicrosoft.com.

1. Azure File Creation
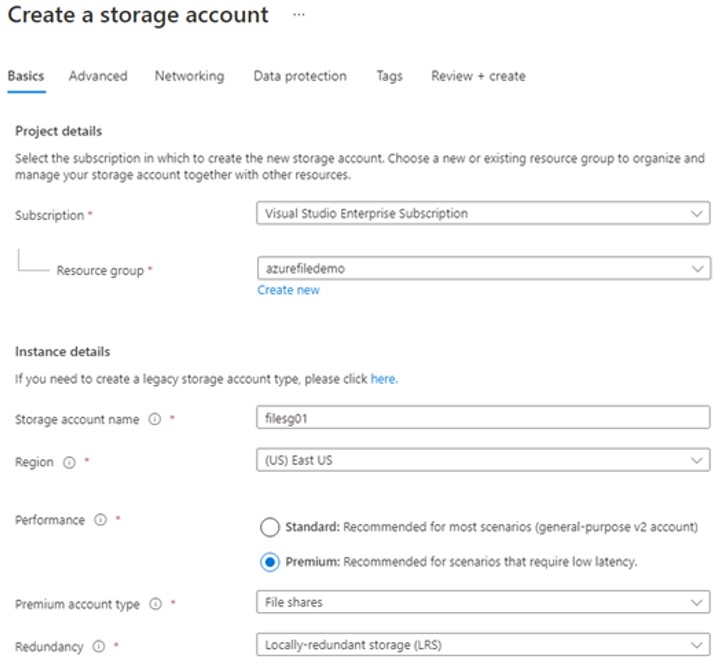
Login into Azure Portal with owner or contributor permission, search for a storage account service, and click on create. Select Azure Subscription, resource group, and region. Provide a unique name to the service. Select performance SKU. In the below example, I have selected a premium SKU for a File share. Based on how you want to store files, select the redundancy option. I have selected Locally-redundant storage (LRS). SKU and Redundancy options may be available depending on your region selection.
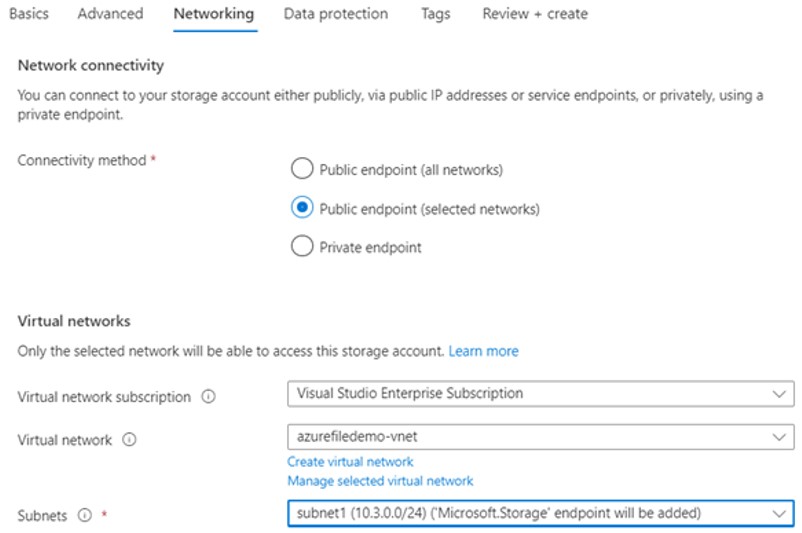
On the Advanced screen, keep the default option and proceed with the Networking screen. If you connect a Storage account containing an Azure file with a limited Virtual network, select the 2nd option, Public endpoint (selected networks) as shown below. Select Subscription, Virtual Network, and subnet to configure it. Public endpoint (all networks) increase security risk. The Private endpoint is always the preferred option that assigns private IP to the Azure file service.
On the Data Protection screen, keep 7 days default value as a soft limit on Azure file shares. You can remove it if you do not want it, It can extend up to 365 days as well. Add tags on the next screen, and click on create. The Azure File service will be ready to use in 10-15 min, create a directory and upload the files.
2. Azure File Ad Integration
2.a Login into the domain-joined client machine with a domain admin credential, download the AzFileHybrid module, or copy it from the repository if downloaded already and run the script as shown.

2.b Import the module, connect to the Azure account and set the variable by updating the correct value
# Import AzFilesHybrid module
Import-Module -Name AzFilesHybrid

#Connect to Azure Subecription
Connect-AzAccount

#Define parameters
$SubscriptionId = "<your-subscription-id-here>"
$ResourceGroupName = "<resource-group-name-here>"
$StorageAccountName = "<storage-account-name-here>"
$DomainAccountType = "ComputerAccount"
$OuDistinguishedName = "<ou-distinguishedname-here>"
$EncryptionType = "<AES256|RC4|AES256,RC4>"
Find variable for executing :
- Subscription id – It will get from the Azure portal -> subscription
- Resource group – select the resource group where a storage account is created, open the Azure storage account and you will find the resource group name in the overview
- ou-distinguished-name – It will get from Active directory, open Active directory user and computers console, right click on OU –> properties, it will show you value in the drop-down
- Encryption – Use AES256 considering it is more secure.
2.c Run the below PowerShell command to join the storage account to a domain
Join-AzStorageAccountForAuth `
-ResourceGroupName $ResourceGroupName `
-StorageAccountName $StorageAccountName `
-DomainAccountType $DomainAccountType `
-OrganizationalUnitDistinguishedName $OuDistinguishedName `
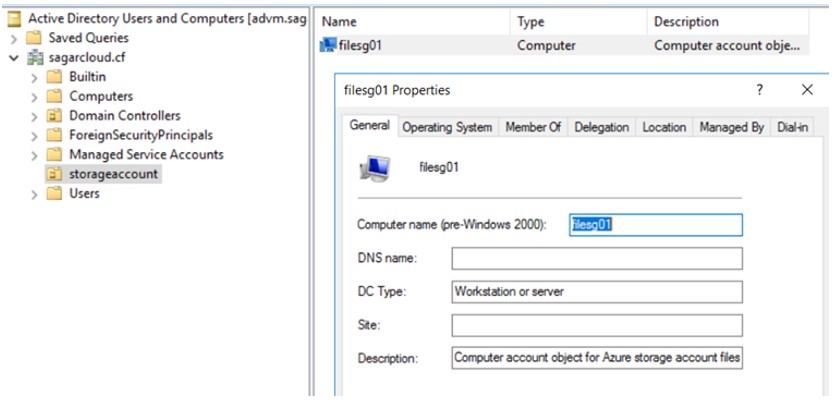
-EncryptionType $EncryptionType2.d After executing the above command successfully, you can notice a storage account object is added.
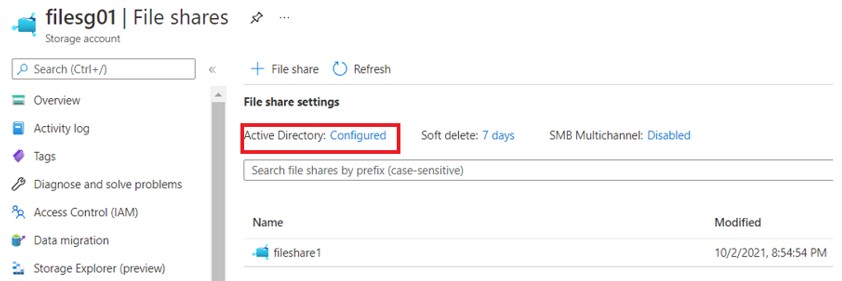
2.e You will notice the status on the Azure file has been changed to AD configured on Azure file console
3. Provide Share Level Permission
There are three types of roles you can assign
- Storage File Data SMB Share Reader – Allows reading access to files and directories
- Storage File Data SMB Share Contributor – Allows for reading, writing, and deleting access to files and directories
- Storage File Data SMB Share Elevated Contributor – Allows for reading, writing, deleting, and modifying ACLs on files and directories
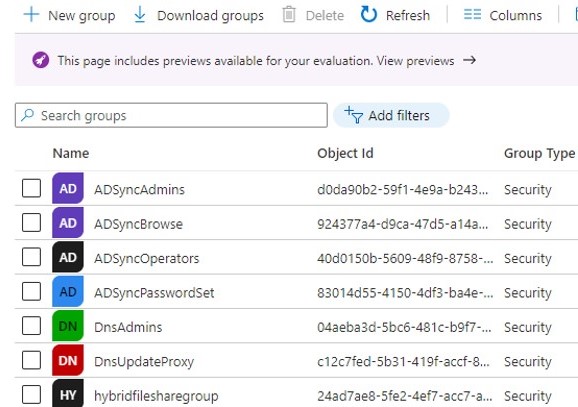
In this demo, I am going with Storage File Data SMB Share Contributor level permission on hybridfilessharegroup named group through Azure Storage IAM.
4. Assign Directory and File-Level Permission
Run the below PowerShell command to mount the drive. Drive is mounted, provide the required NTFS permission to the AD group as shown. Variables storage-account-name, share-name and storage-account-key will be available on the Azure storage account console itself to add.
net use <desired-drive-letter>: \\<storage-account-name>.file.core.windows.net\<share-name> /user:Azure\<storage-account-name> <storage-account-key> 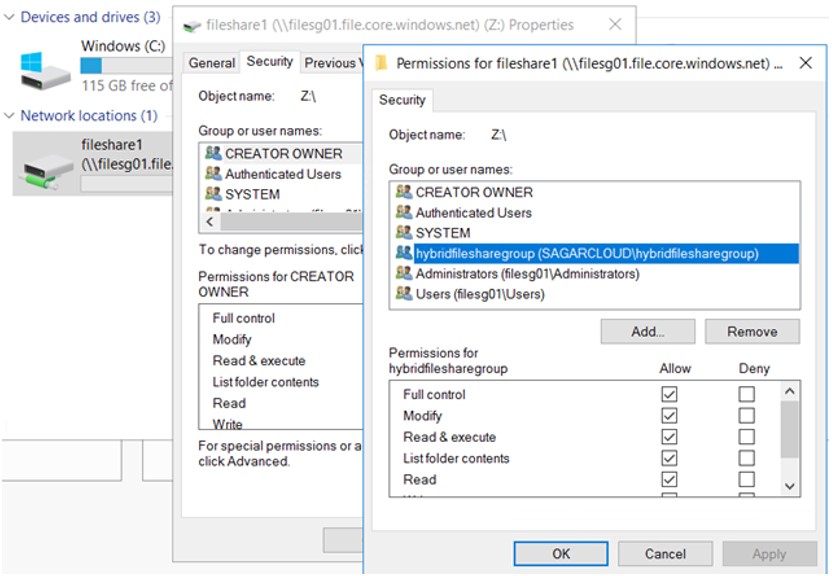
Login into the client machine with a domain user account who are part of hybridfilesharegroup AD DS group and map the drive with the Powershell command. The drive will be mapped, log off and login multiple times to verify the mapped drive retention.
net use y: \\filesg01.file.core.windows.net\fileshare15. Update the Password of the AD object
To avoid default password policy execution on the Azure Storage AD object, you can put it in a separate organizational unit and disable group policy inheritance on the OU.
Thanks for reading. Share your feedback.